Activity: Turn Your Favourite Game into a 3D Set Design
Set designers for theatre, dance and opera make models of their ideas as part of the design process. The designer’s job is to design a world where this story can take place. The model is a realistic representation of what the set will look like. It is built inside a model theatre and helps the creative team to make decisions about what the set looks like and how it will be used in the production. It is called a “model box”. Designers use the scale of 1:25, this means that everything is 25 times smaller than real life. In this exercise we wont worry about scale but it is worth thinking about whether you image looks believable!
In this exercise, you will make a model theatre out of a shoe box and, in it, make a 3D model of a computer game.
What you will need:
- A shoebox
- A ruler
- Scissors
- Glue and tape
- A pencil
- Photocopies of images downloaded from the internet
- Coloured pencils, watercolours or pastels
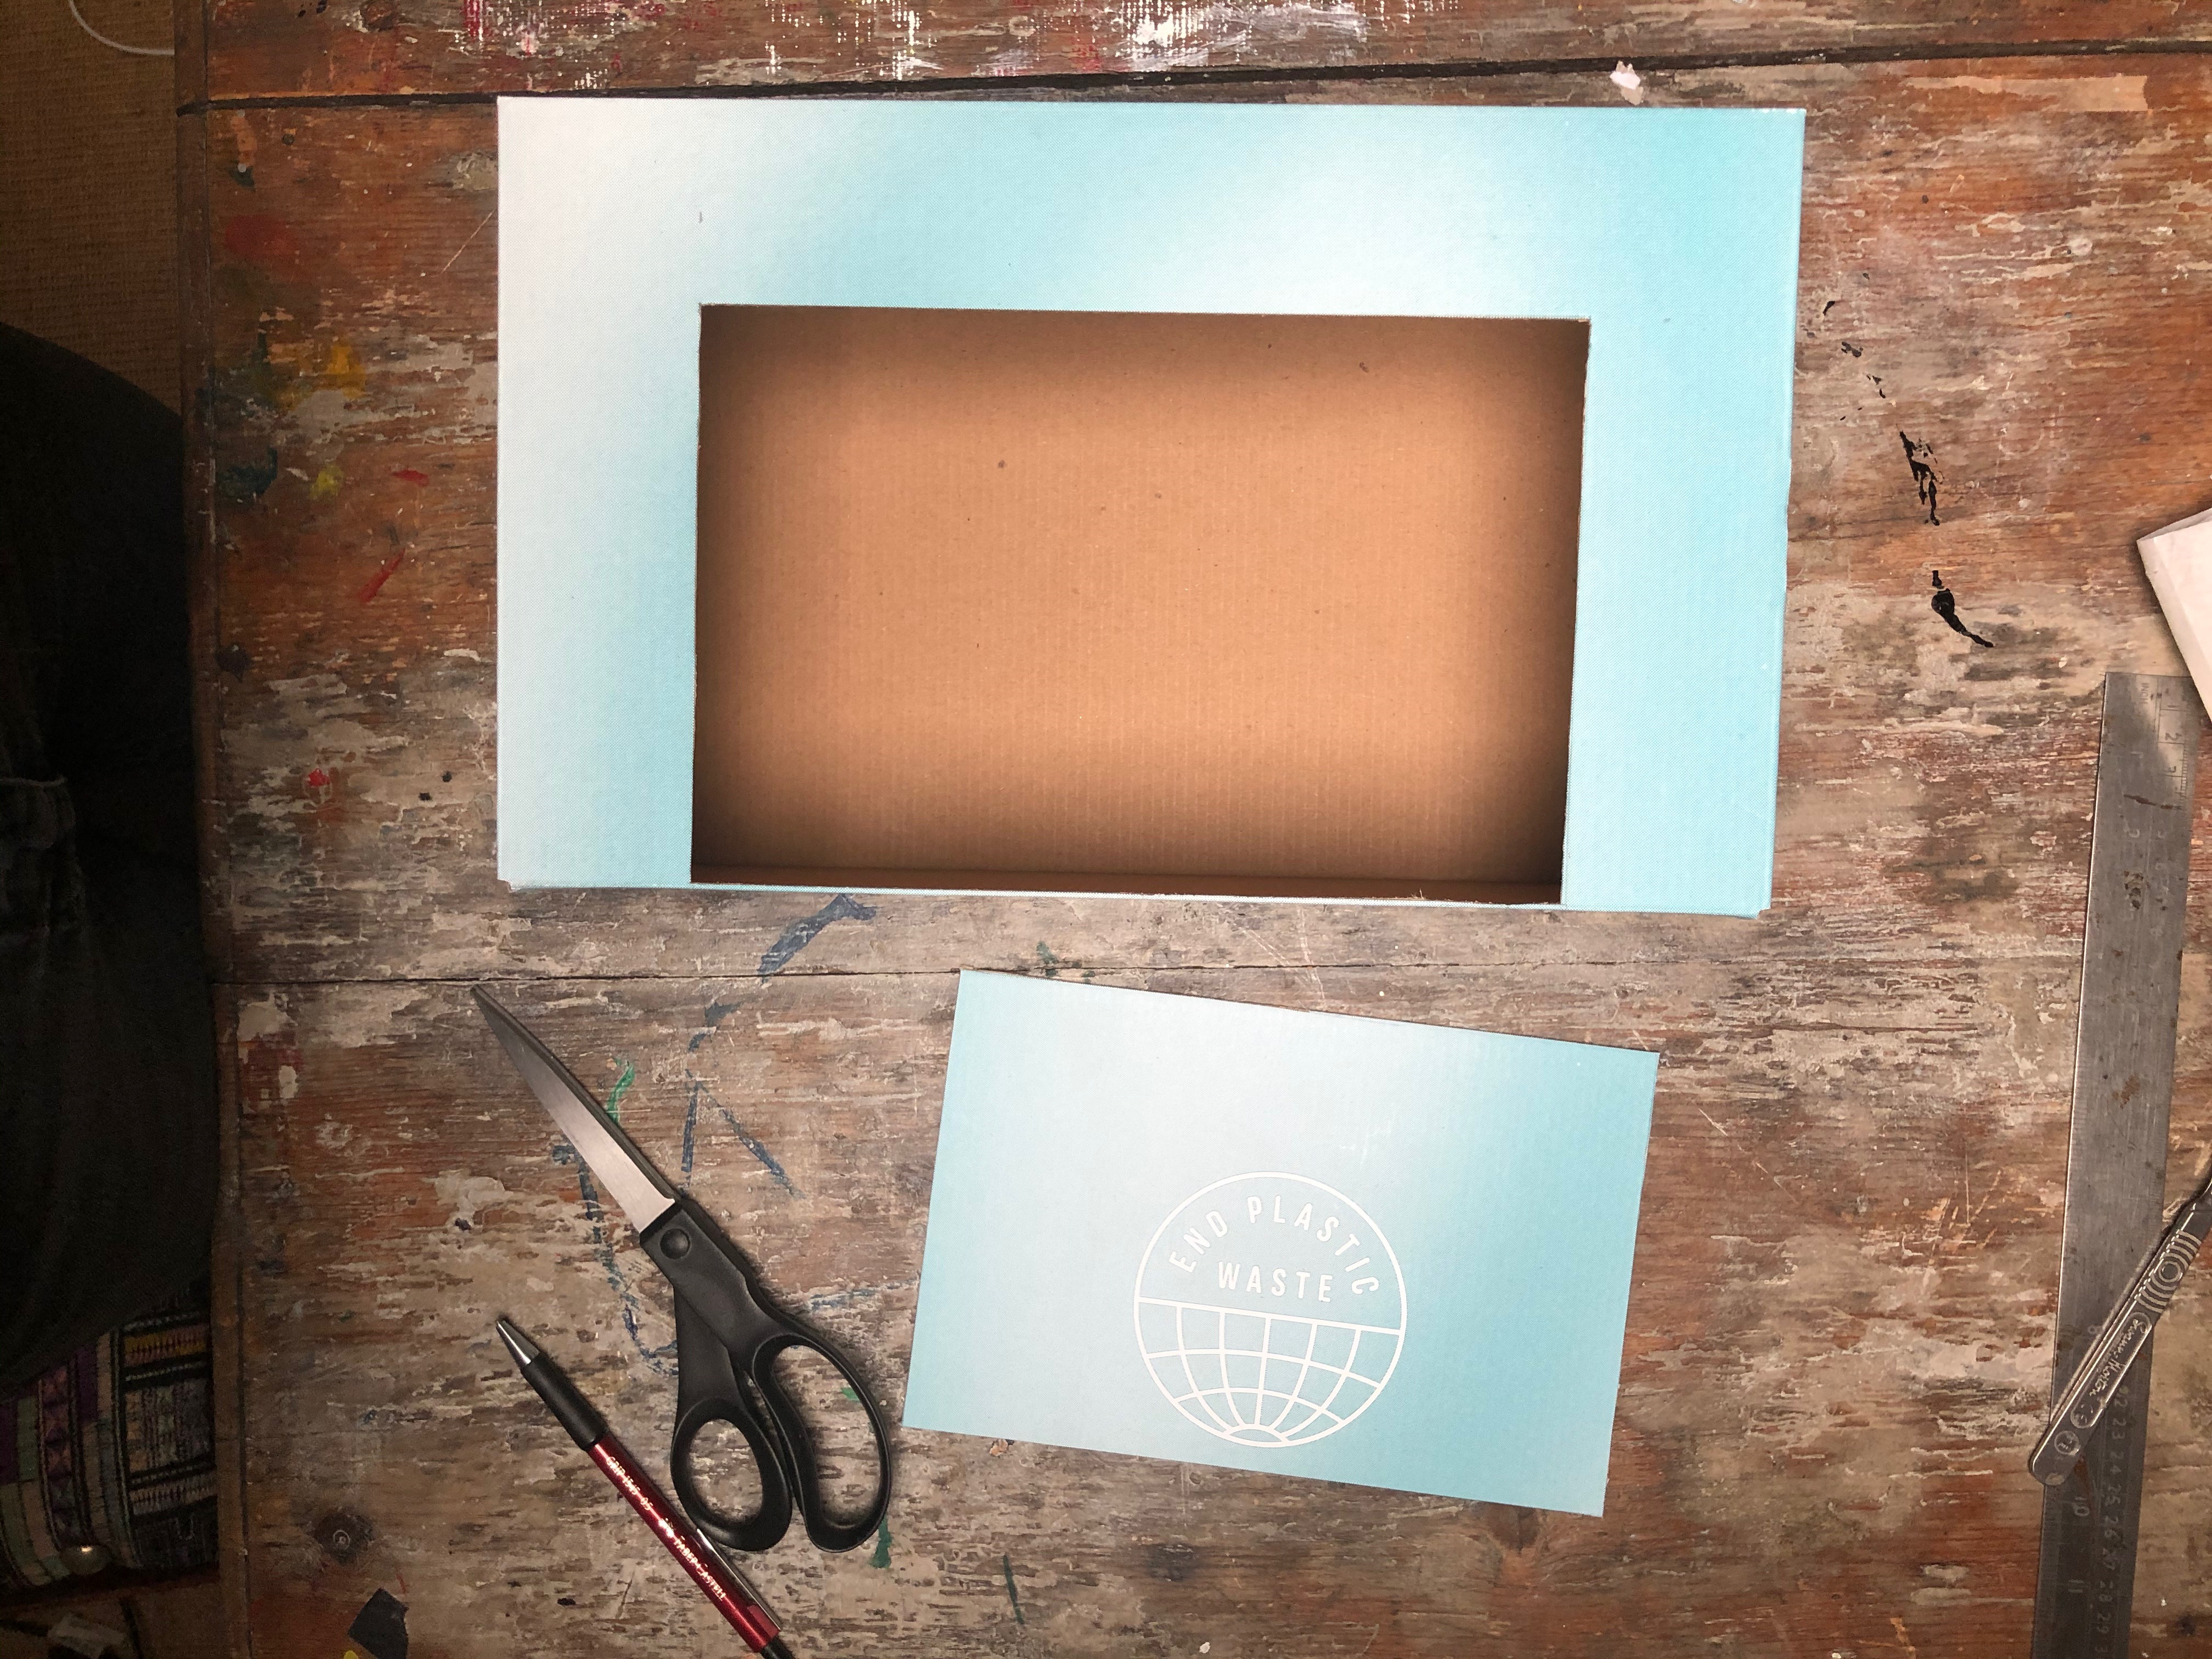
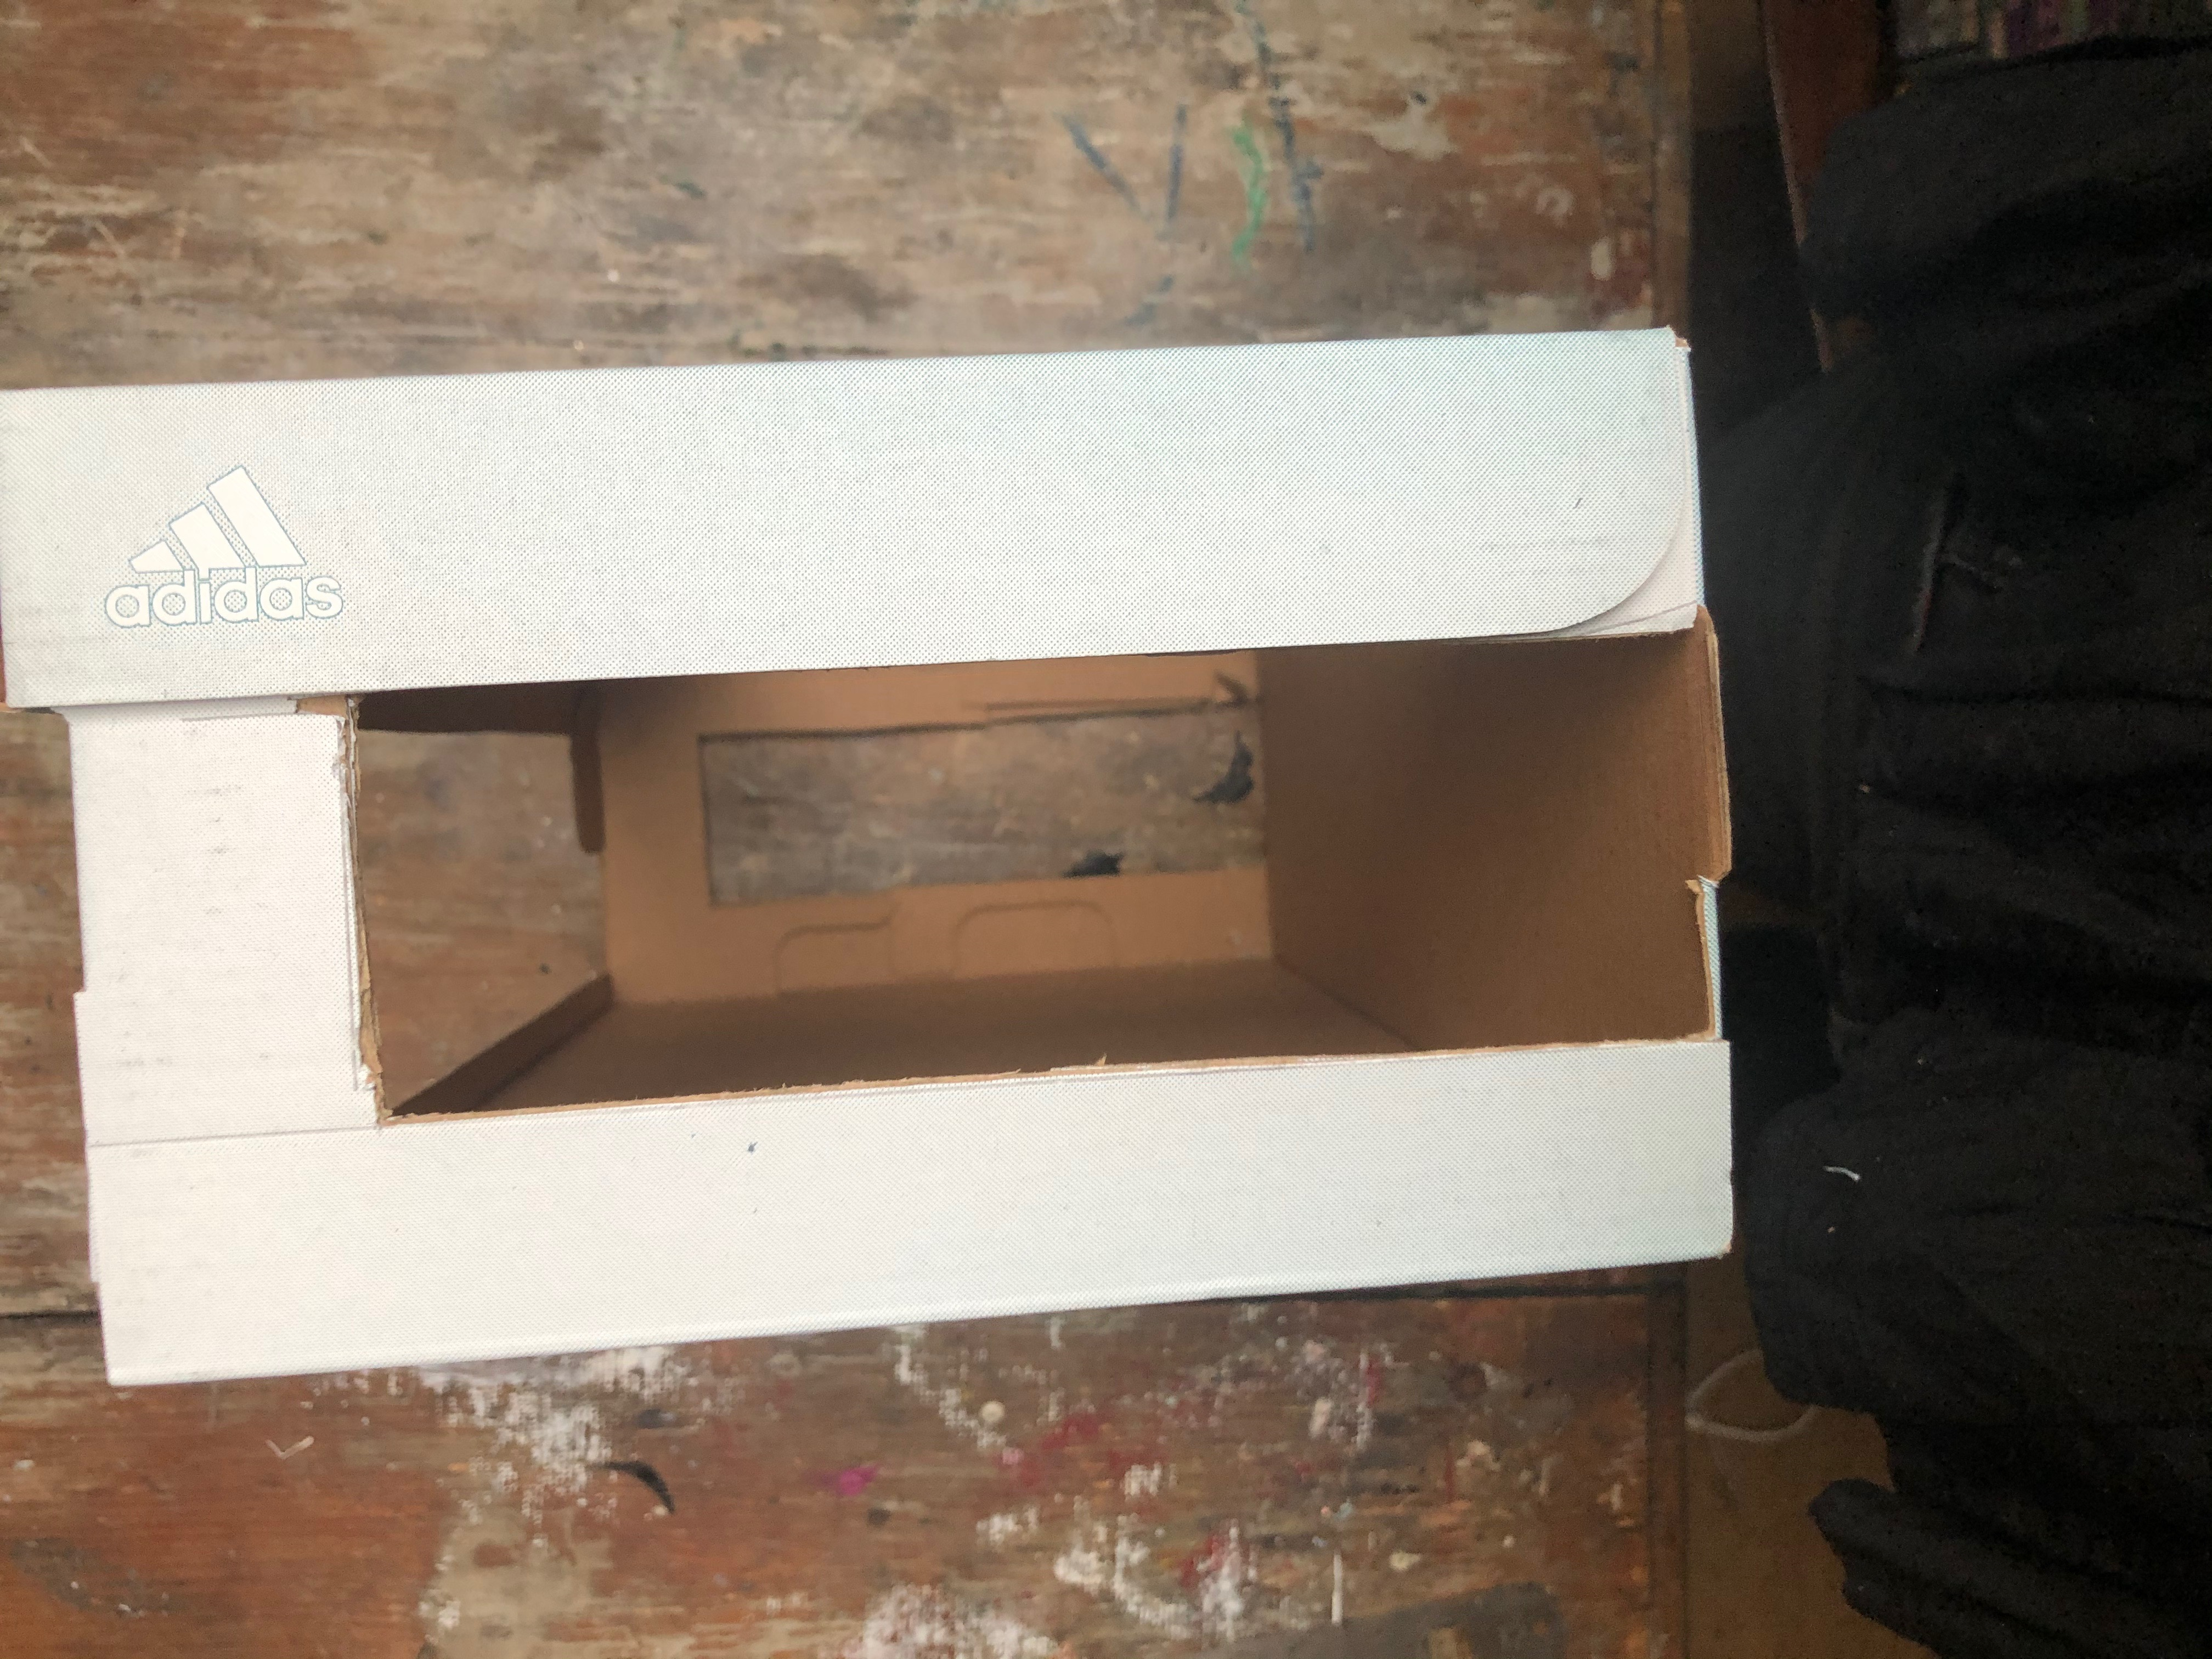
- You need to make the lid into the stage opening. We call this the proscenium arch. Sometimes this will have curtains that can be drawn across it. In the picture below, I left a 5cm gap on three sides of the lid, drew a line in pencil and then cut out the rectangle.
- Next, you need to make openings in the roof and sides of the theatre. This is so you can hang your scenery from above and access the “wing space” inside the theatre.
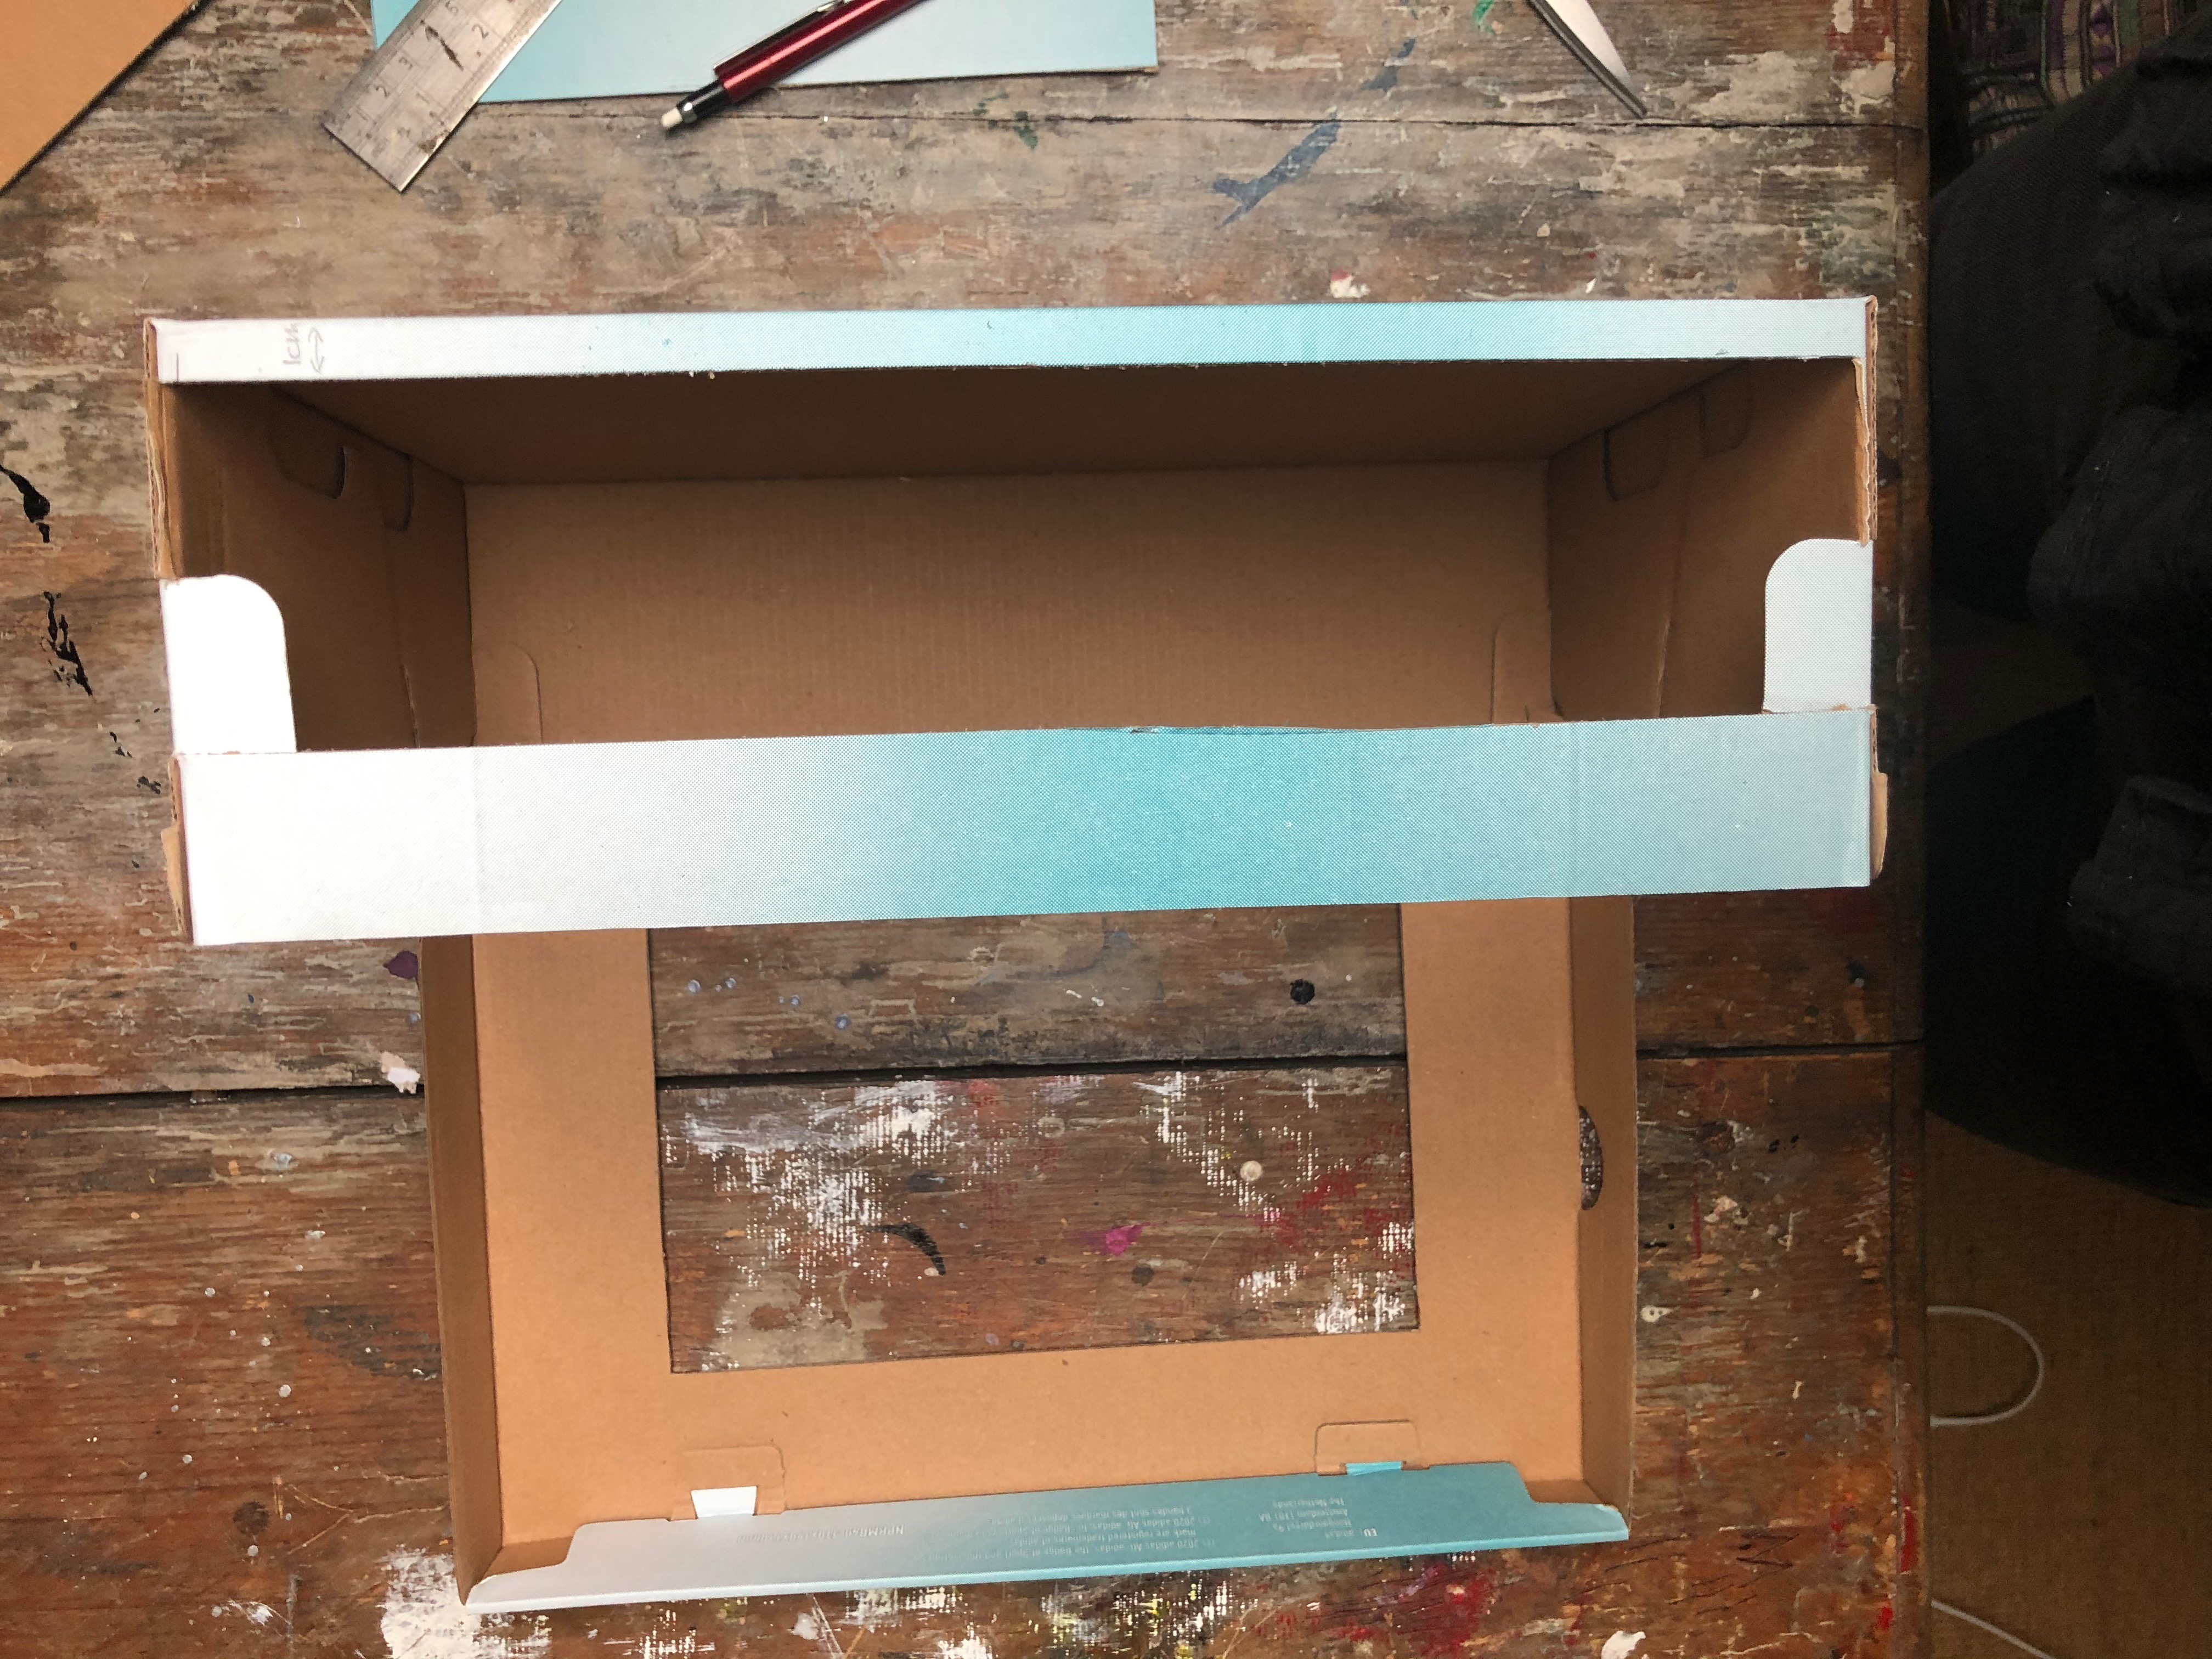
- Either side of the performing area, behind the proscenium arch, are the “wings”. These areas are hidden from view from the audience and are where performers and scenery enter the stage from. We are going to make openings on either side of our box so that we can easily access this bit of our model theatre.The easiest way to do this is to use the side of the lid as a guide and then use the width of a ruler for the other two lines. Then cut out. KEEP THESE TWO RECTANGLES FOR LATER!

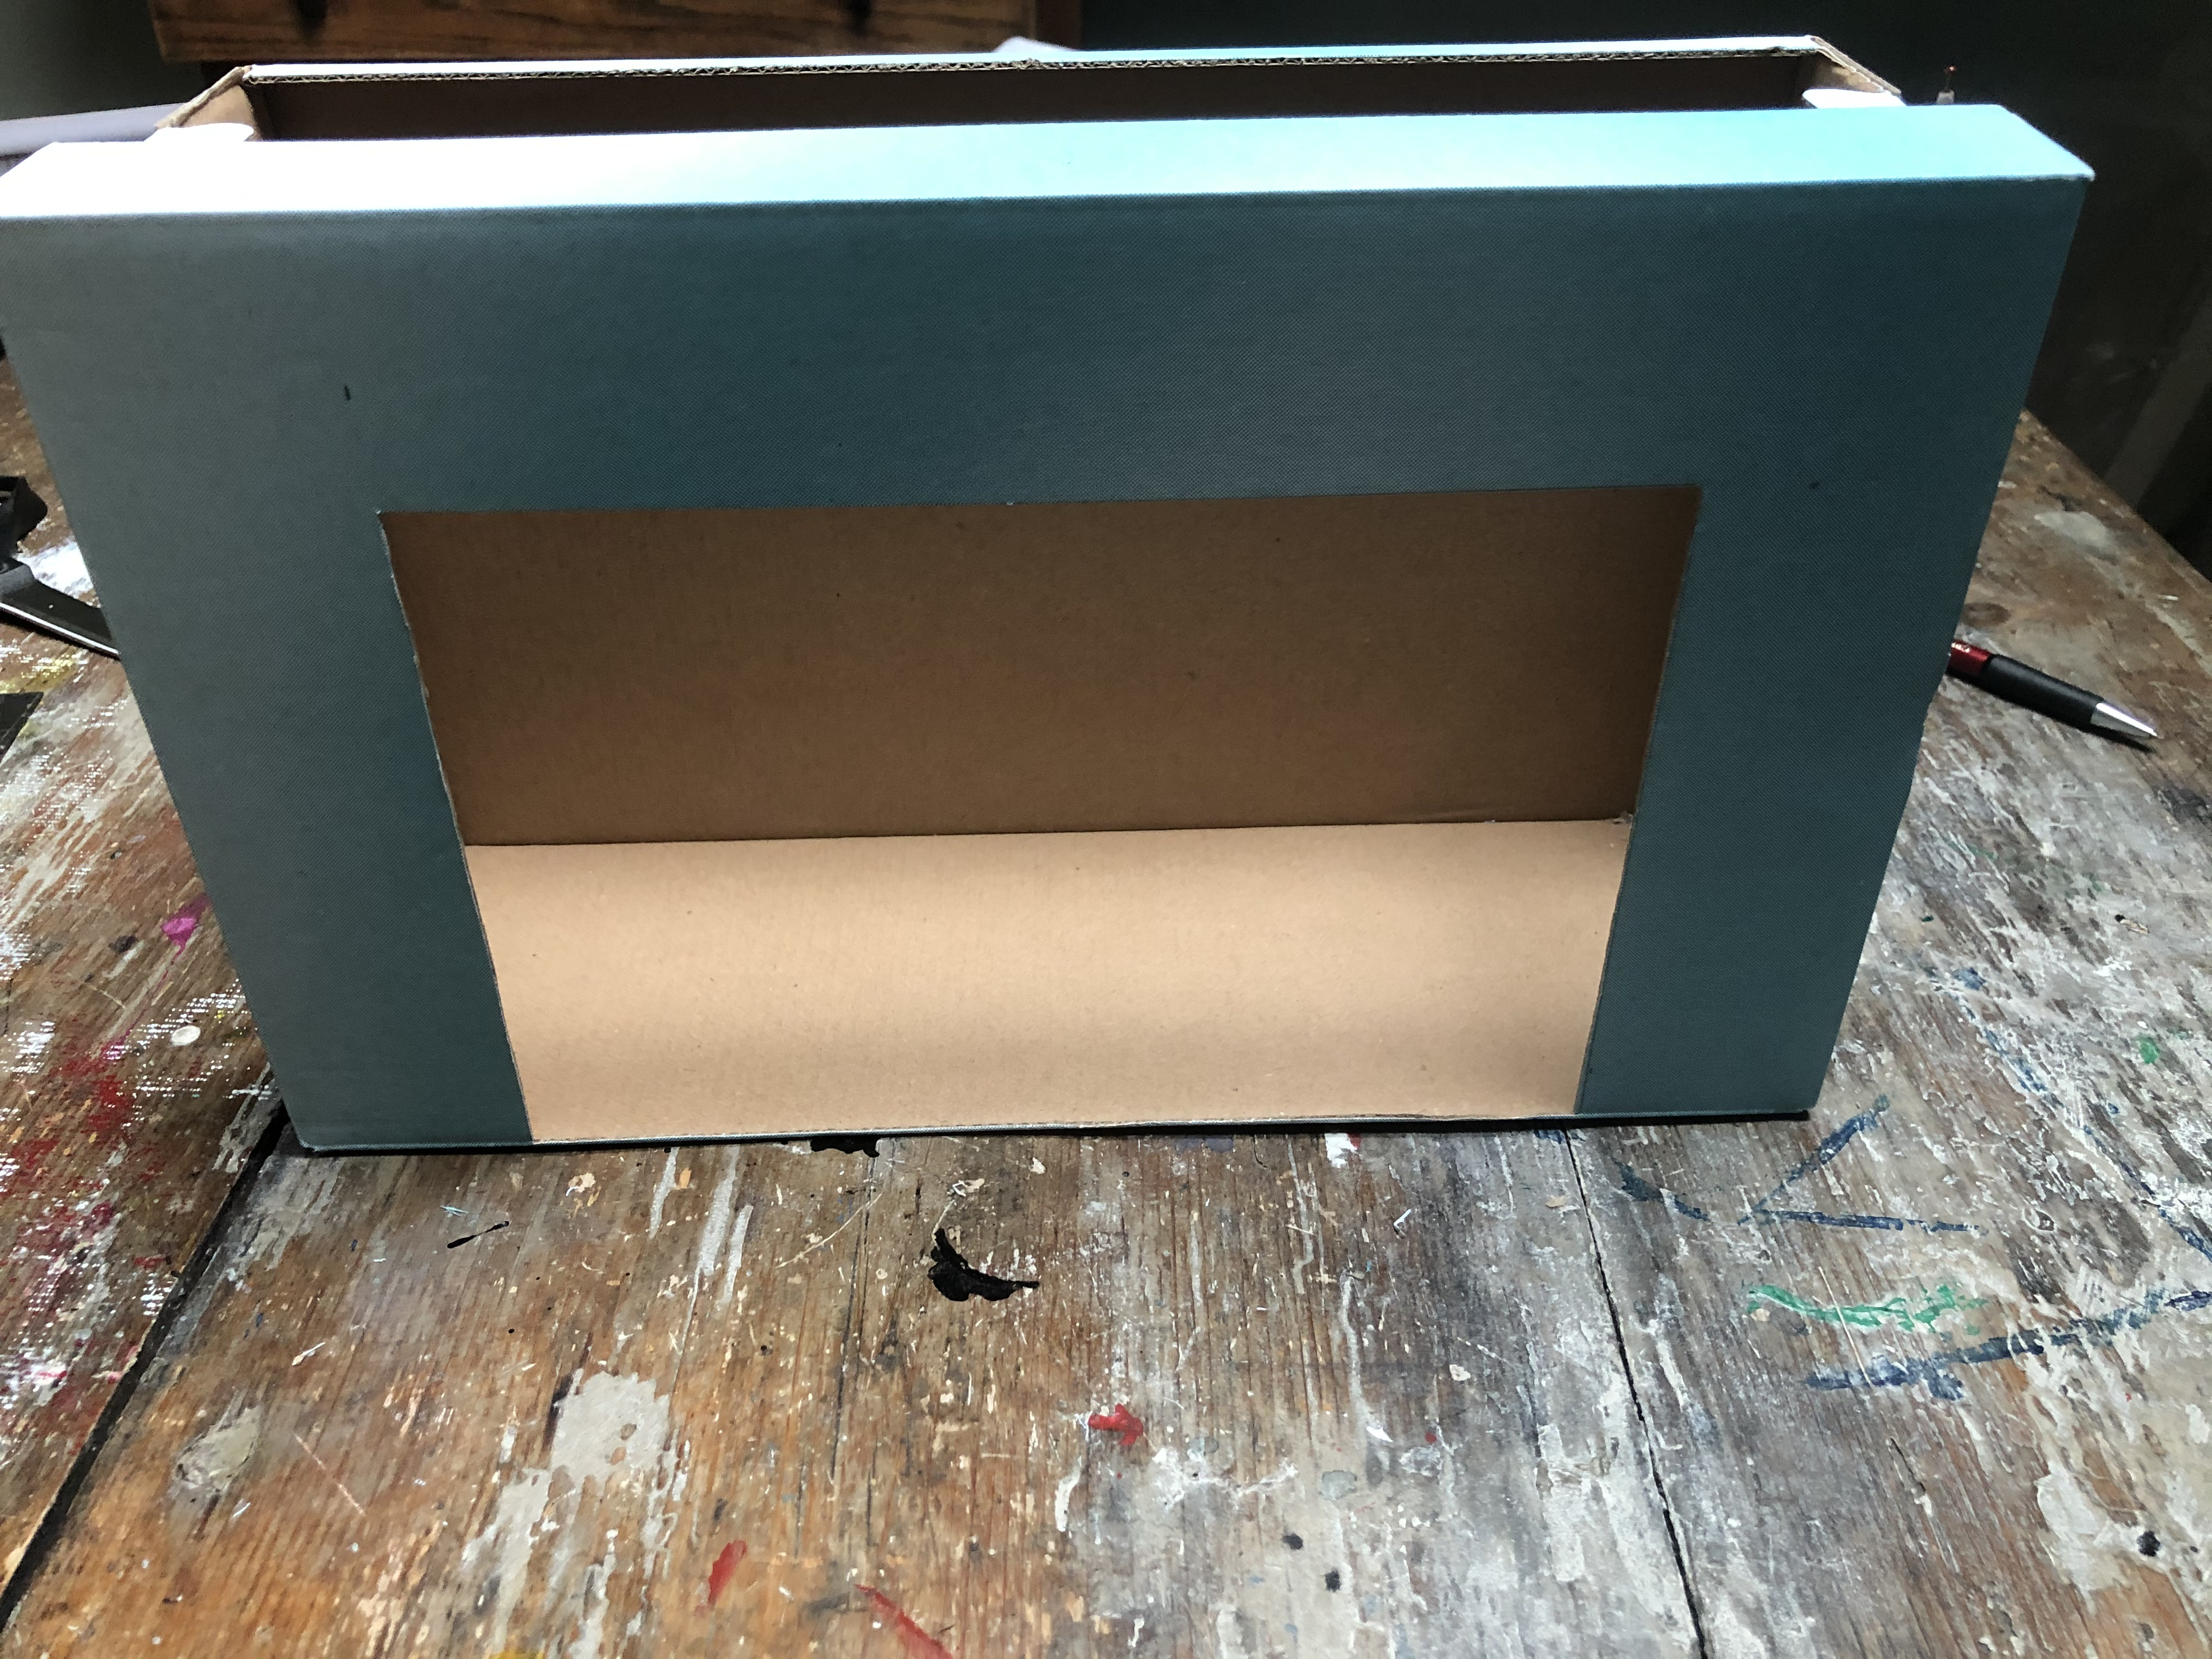
Now your model theatre is ready!
There is an opening at the front called a proscenium arch. You could add tissue paper curtains if you felt like it. There are openings either side for the wings, and an opening on the top to allow scenery to be “flown” in and out.Imagine you are standing on the stage looking out at the audience. The part of the stage in front of you, nearest the audience, is called “down stage”. Behind you, towards the back wall is called “up stage”and either side is called “stage left” and “stage right”.
Now it is time to start designing. I am going to use a computer game for my inspiration but you could use different media if you prefer or even create the whole thing from your own drawings!
You are looking for 3 images which can be put together to create one 3D image. They need to include:
- A back ground or “backdrop”. This could be a sky or skyline
- An image of something which gives detail about the world you are designing and helps the audience to know where the story is happening. You are going to cut this detail out and put it in front of the backdrop.
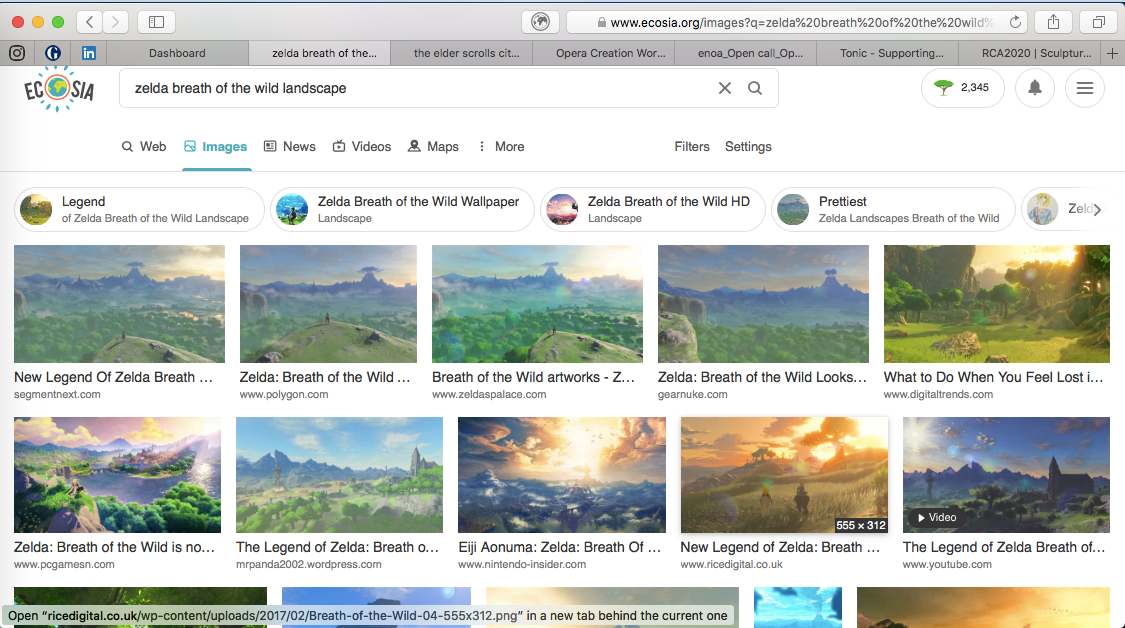
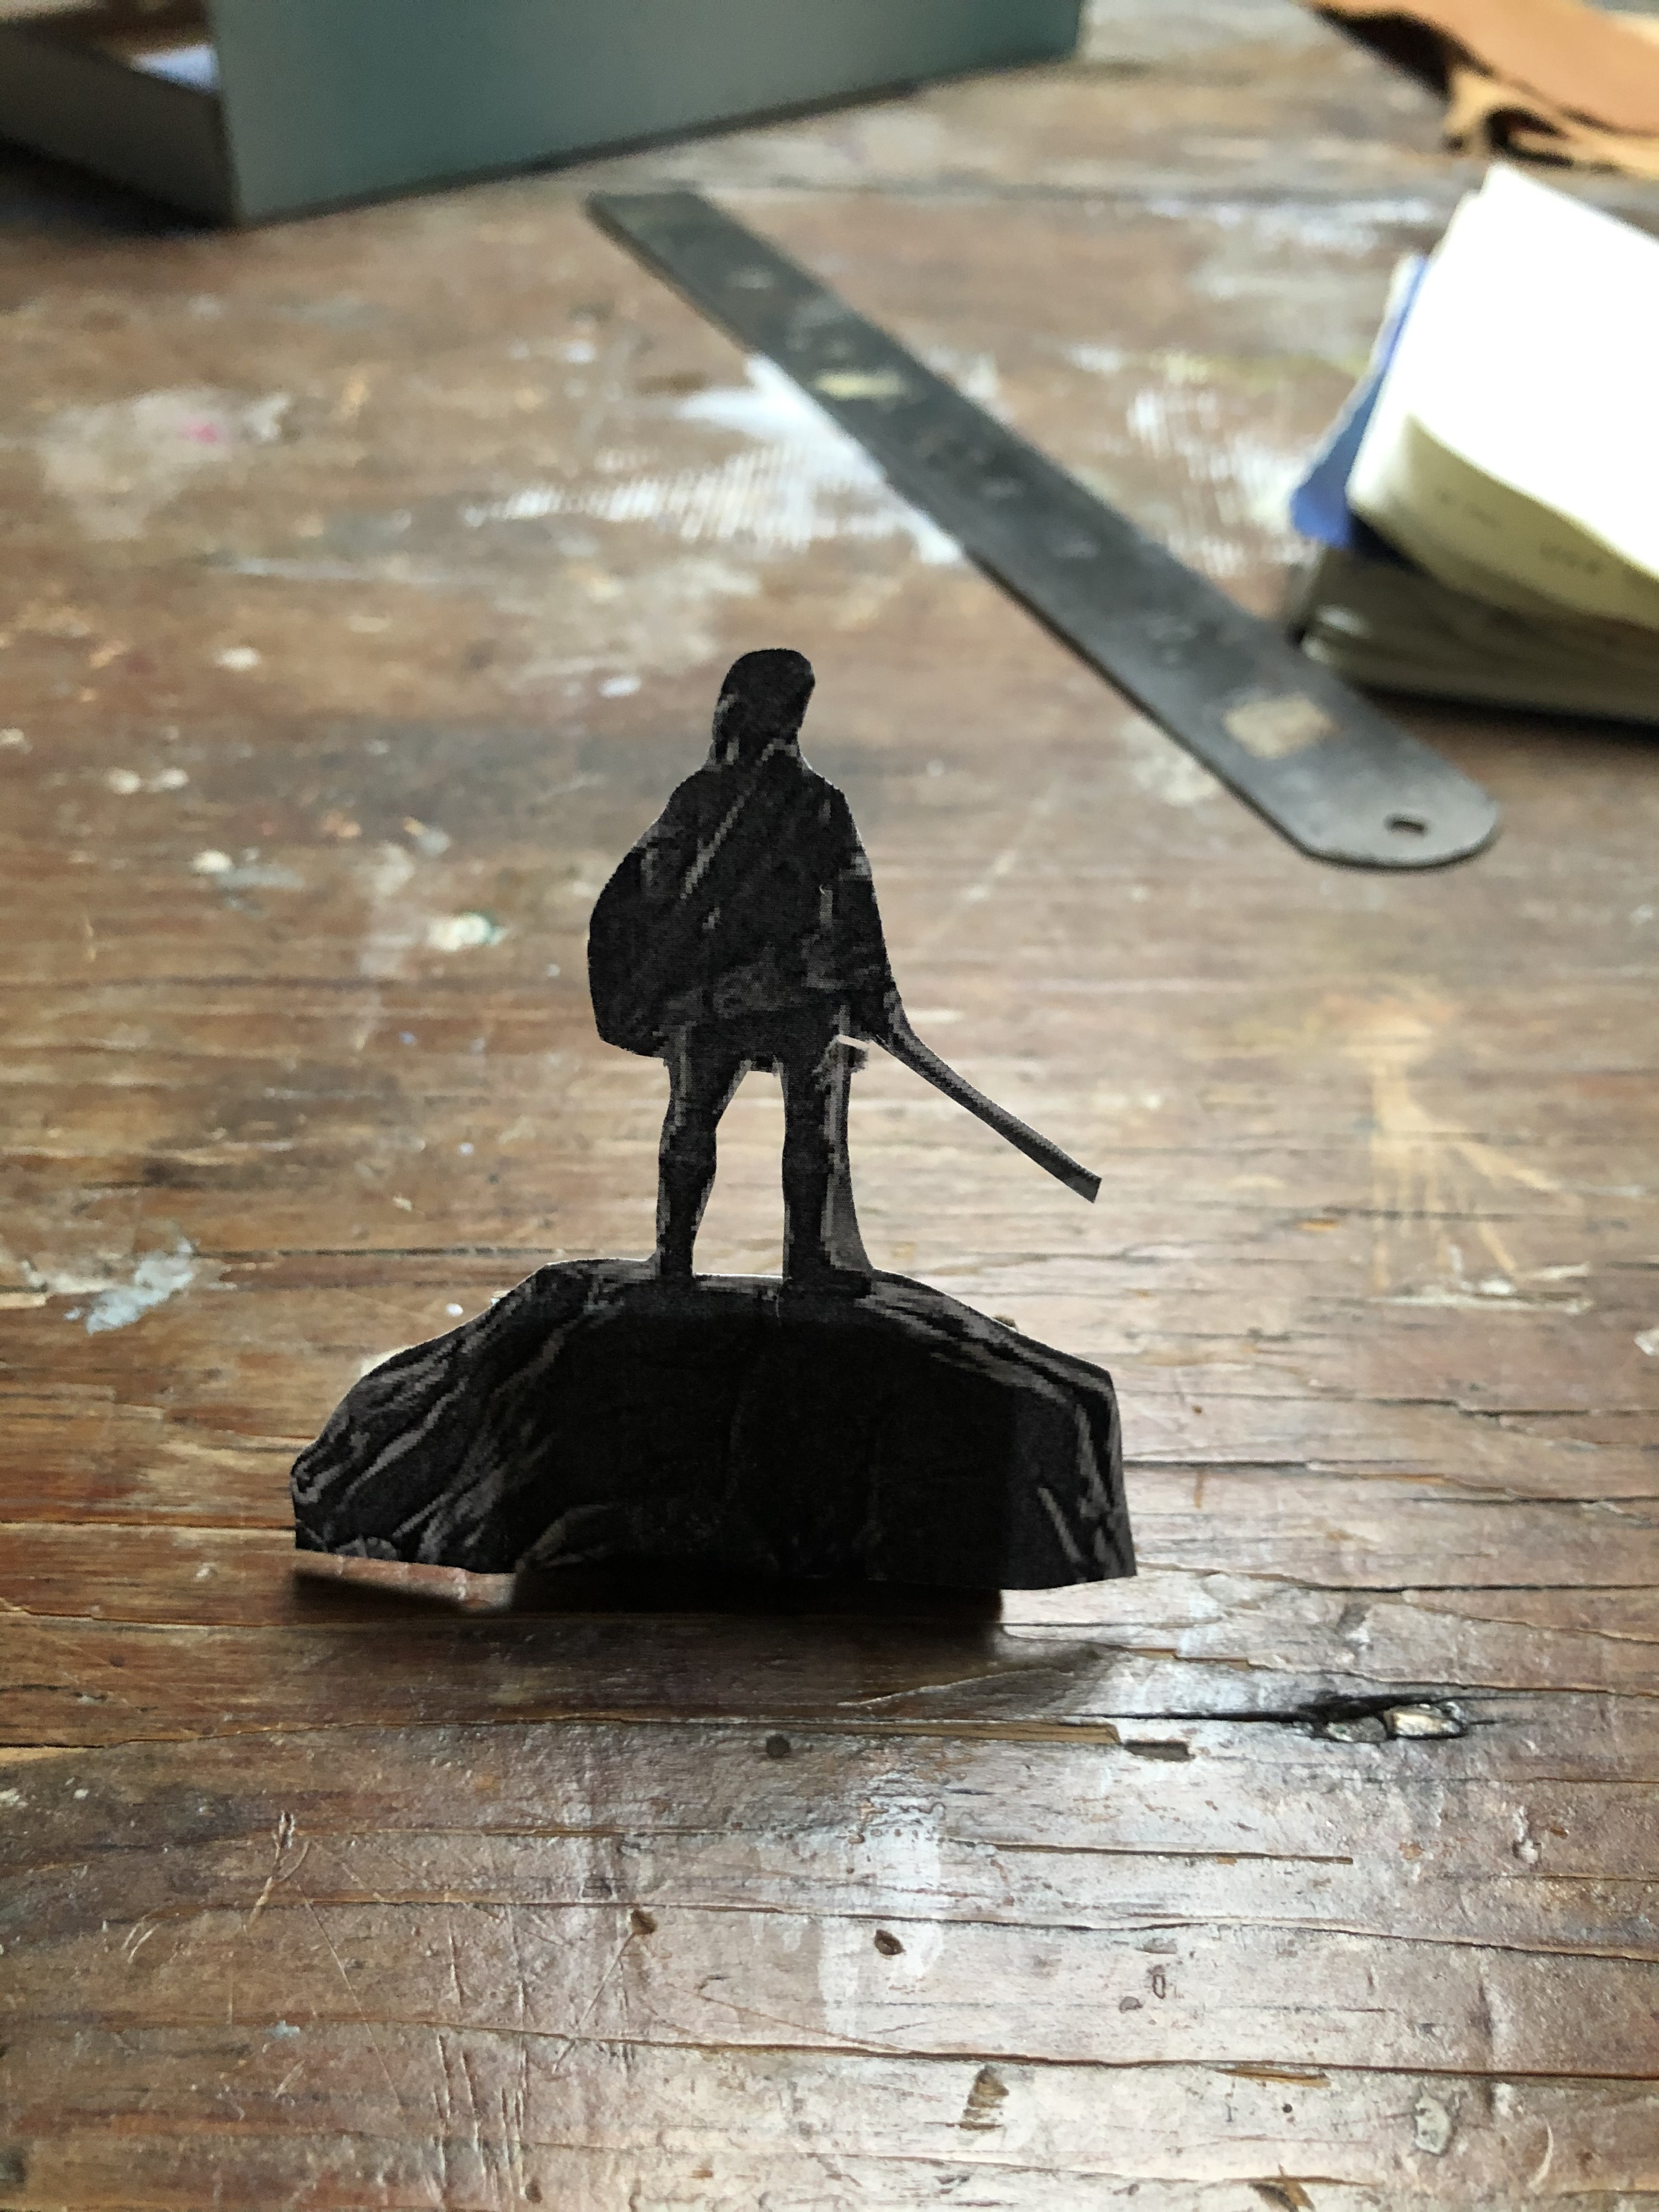
- The “foreground” image. This is something or someone who is important to the story. I chose a figure for this. You could always draw your own figure if you wanted to. This image will also be cut out and be at the front of your stage.To find these images I put the title of the game into my search engine and I added the search term “landscape”.
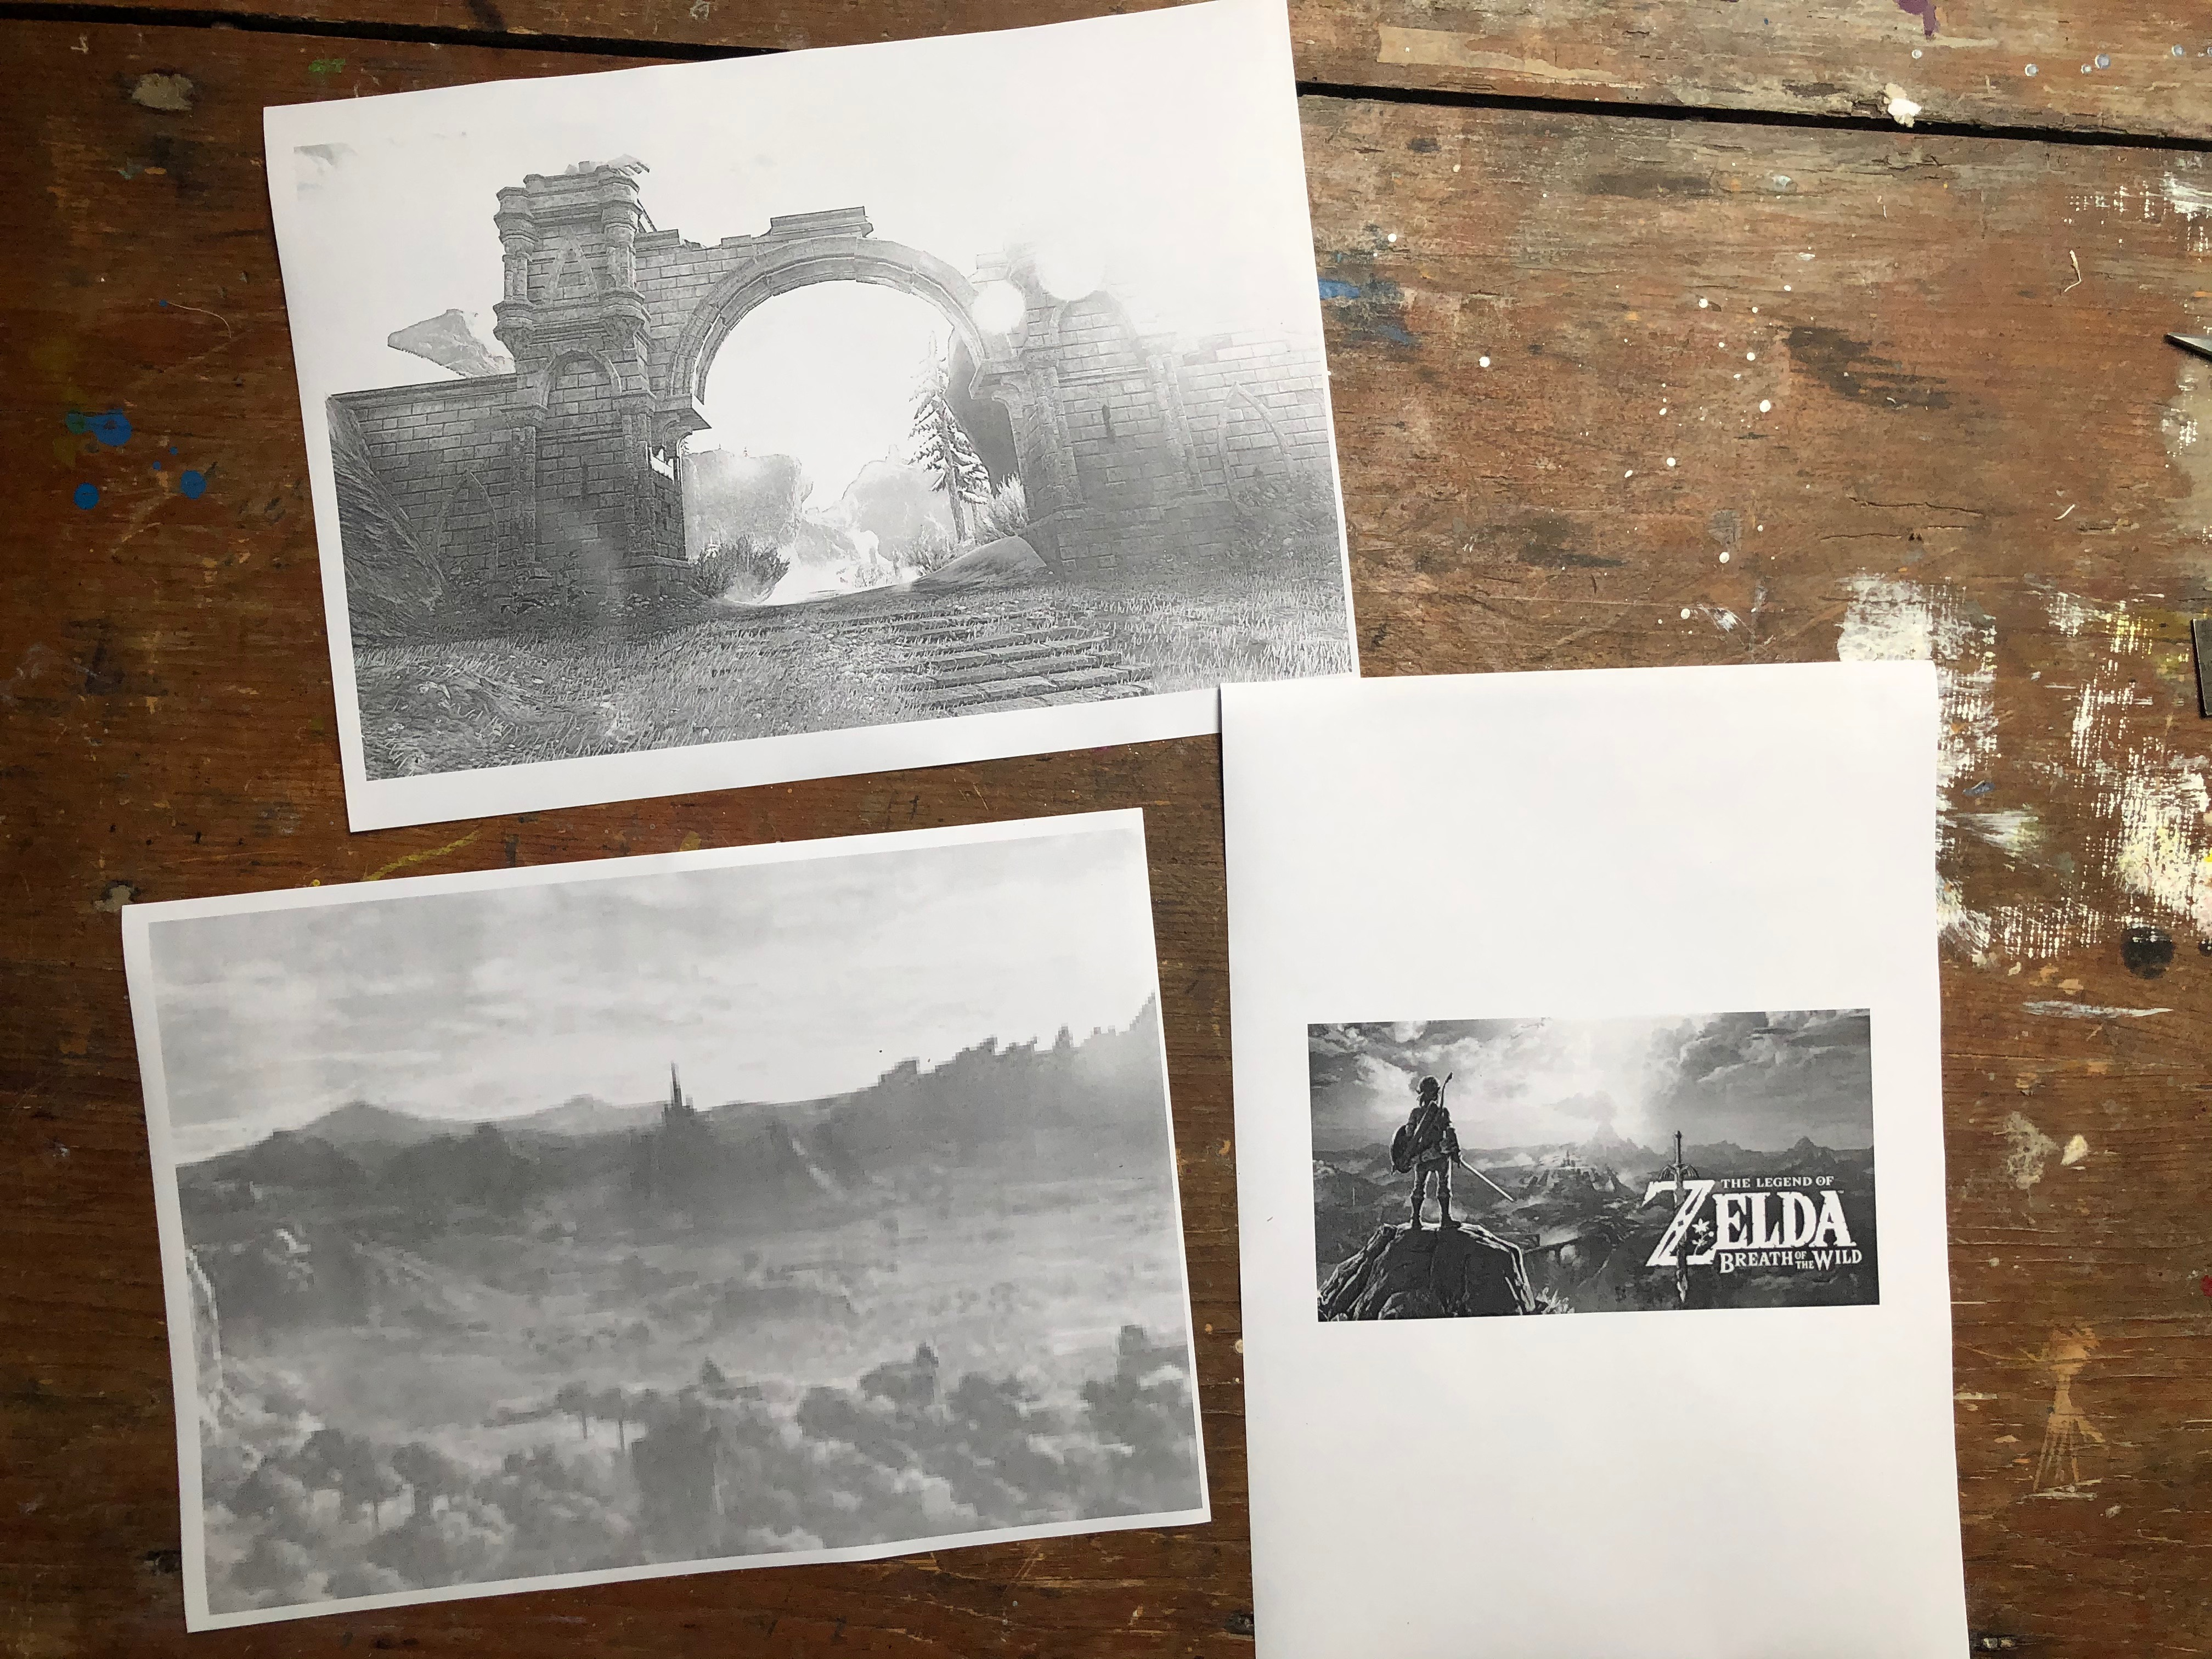
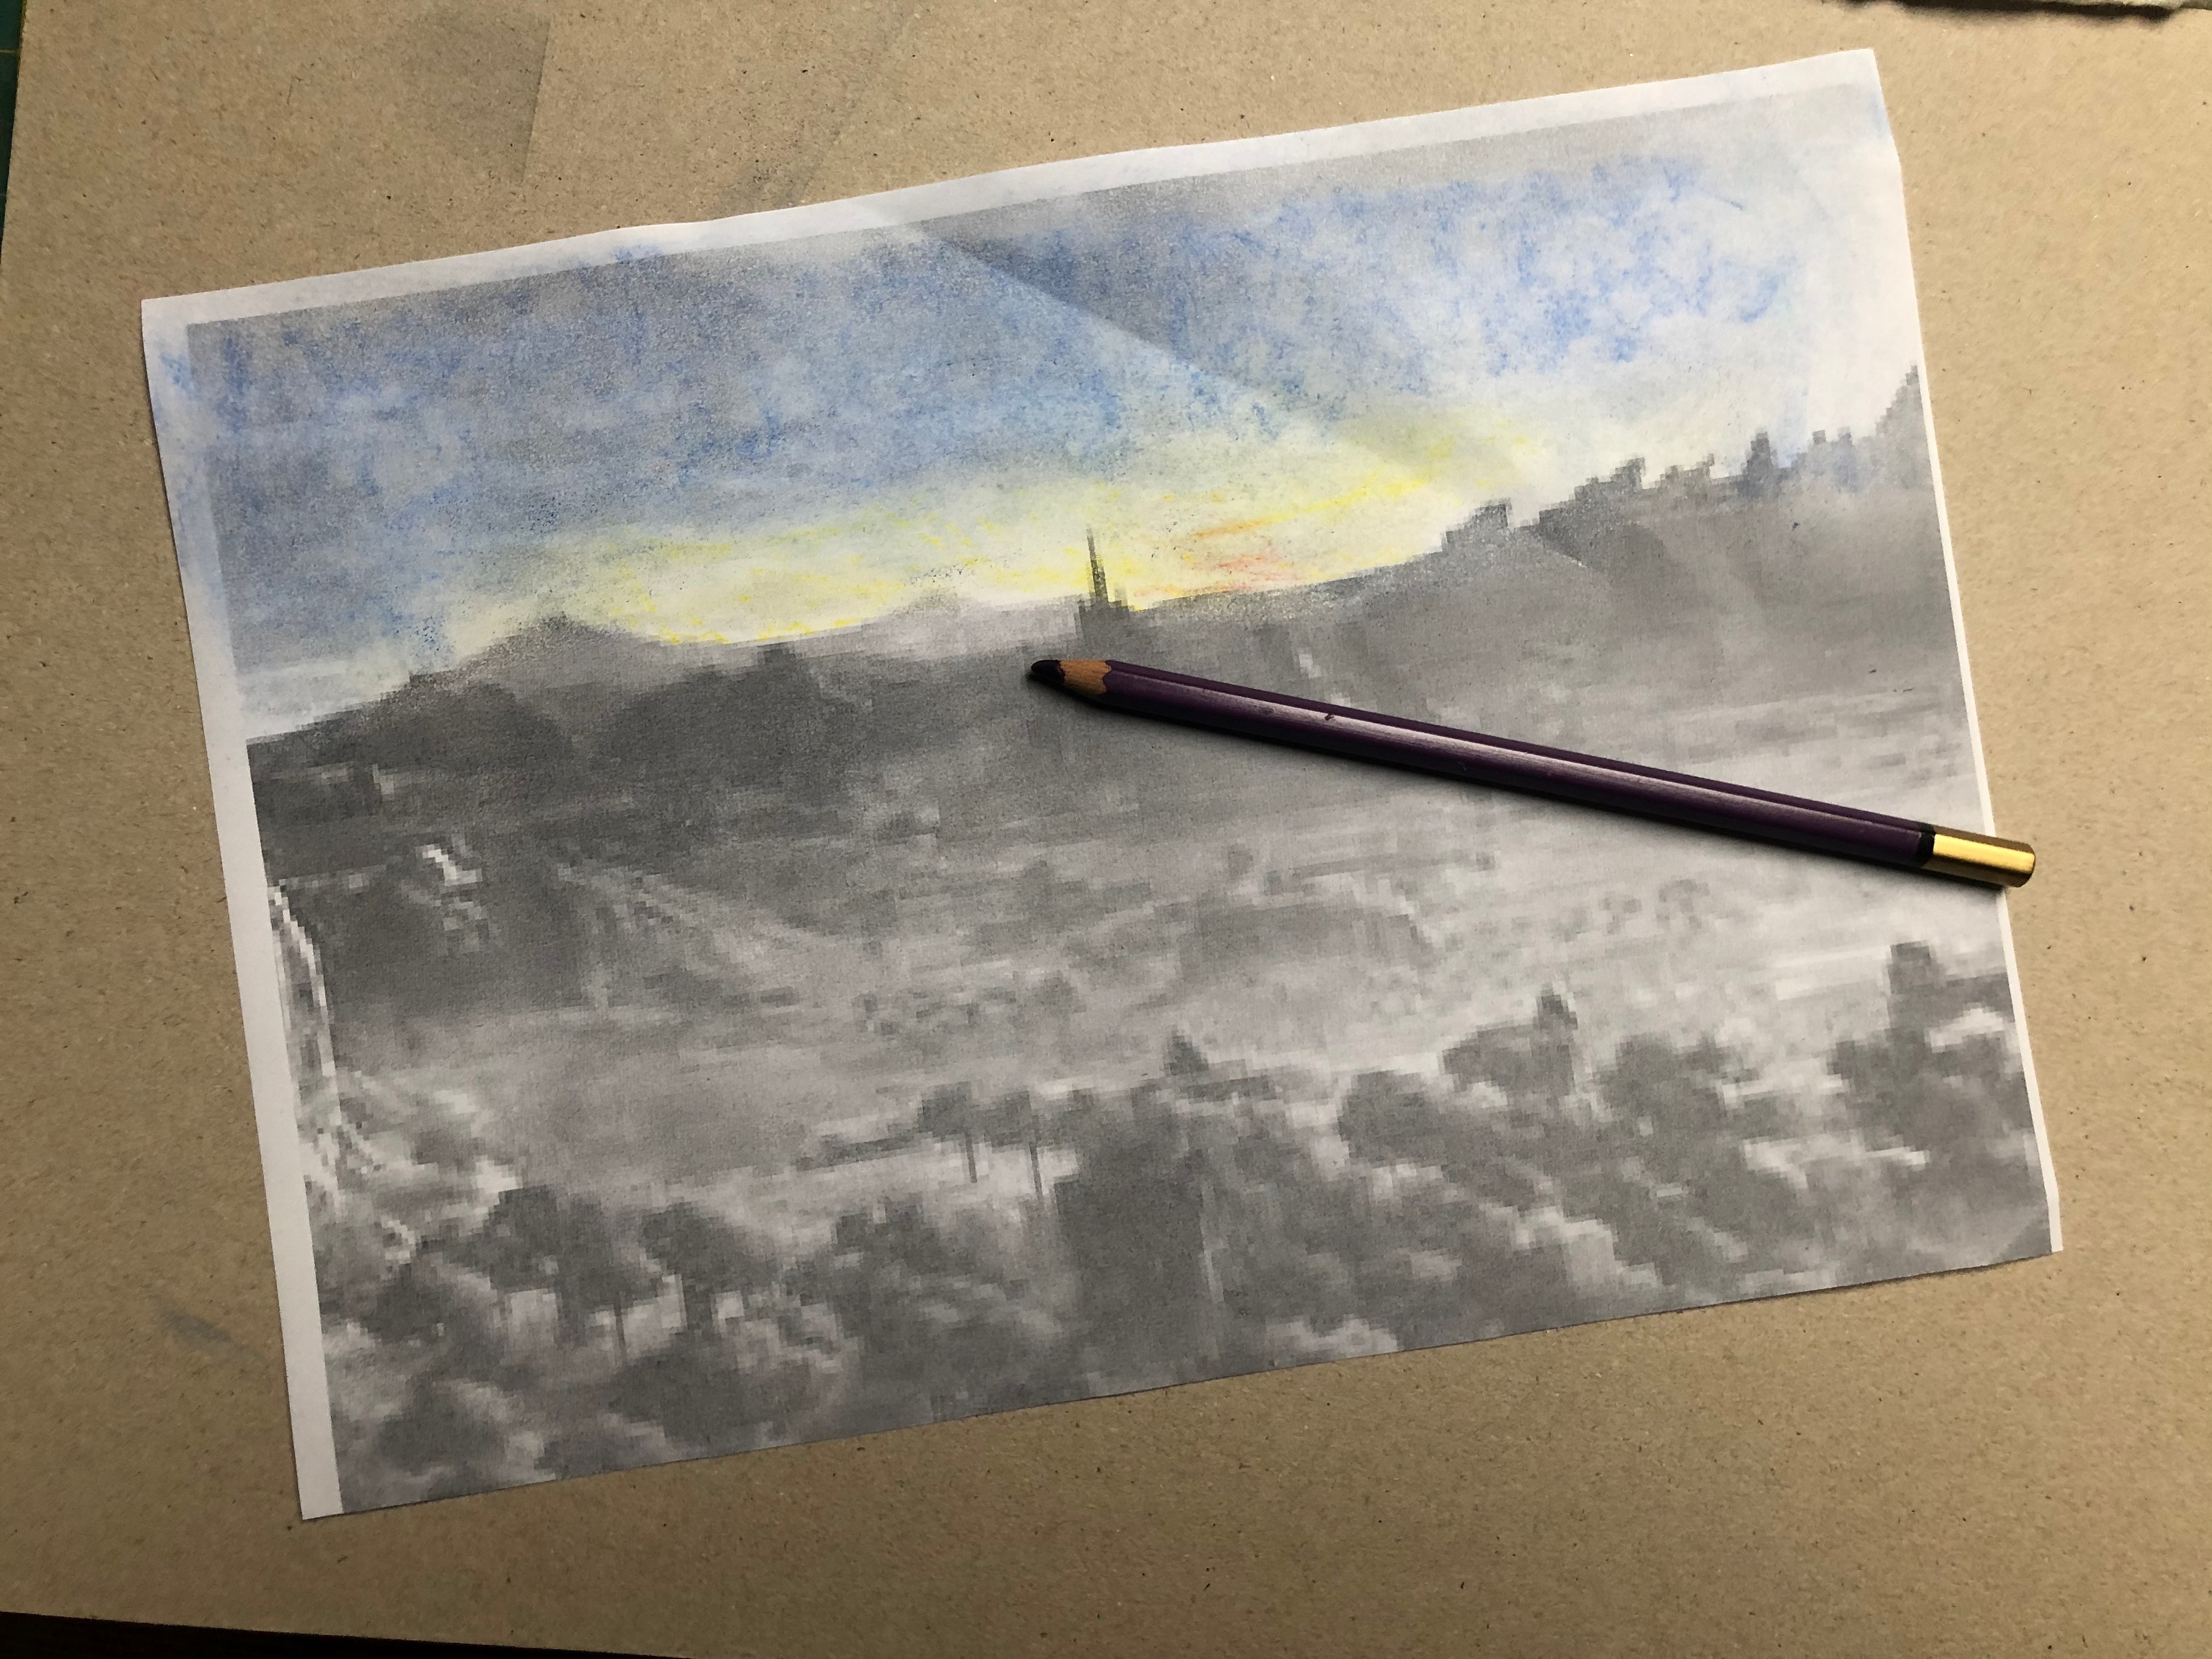
I chose three different images and printed them out in black and white on a printer. The two distant images need to be in landscape format and printed at A4 size. This is so they fit into your model box. The foreground image needs to be smaller than the other two in order to make them look far away.
The distant image is going to be the backdrop for your design. Cut it down to fit on the back wall of your box and then colour it in with either pencils, pastels or water colour paints. Apply the colours lightly and this will allow the detail of the photocopy to be seen through. Something opaque like felt tips or acrylic paint do not work well as you will lose the original image completely. Once you are happy, stick the picture onto the back wall of your theatre.

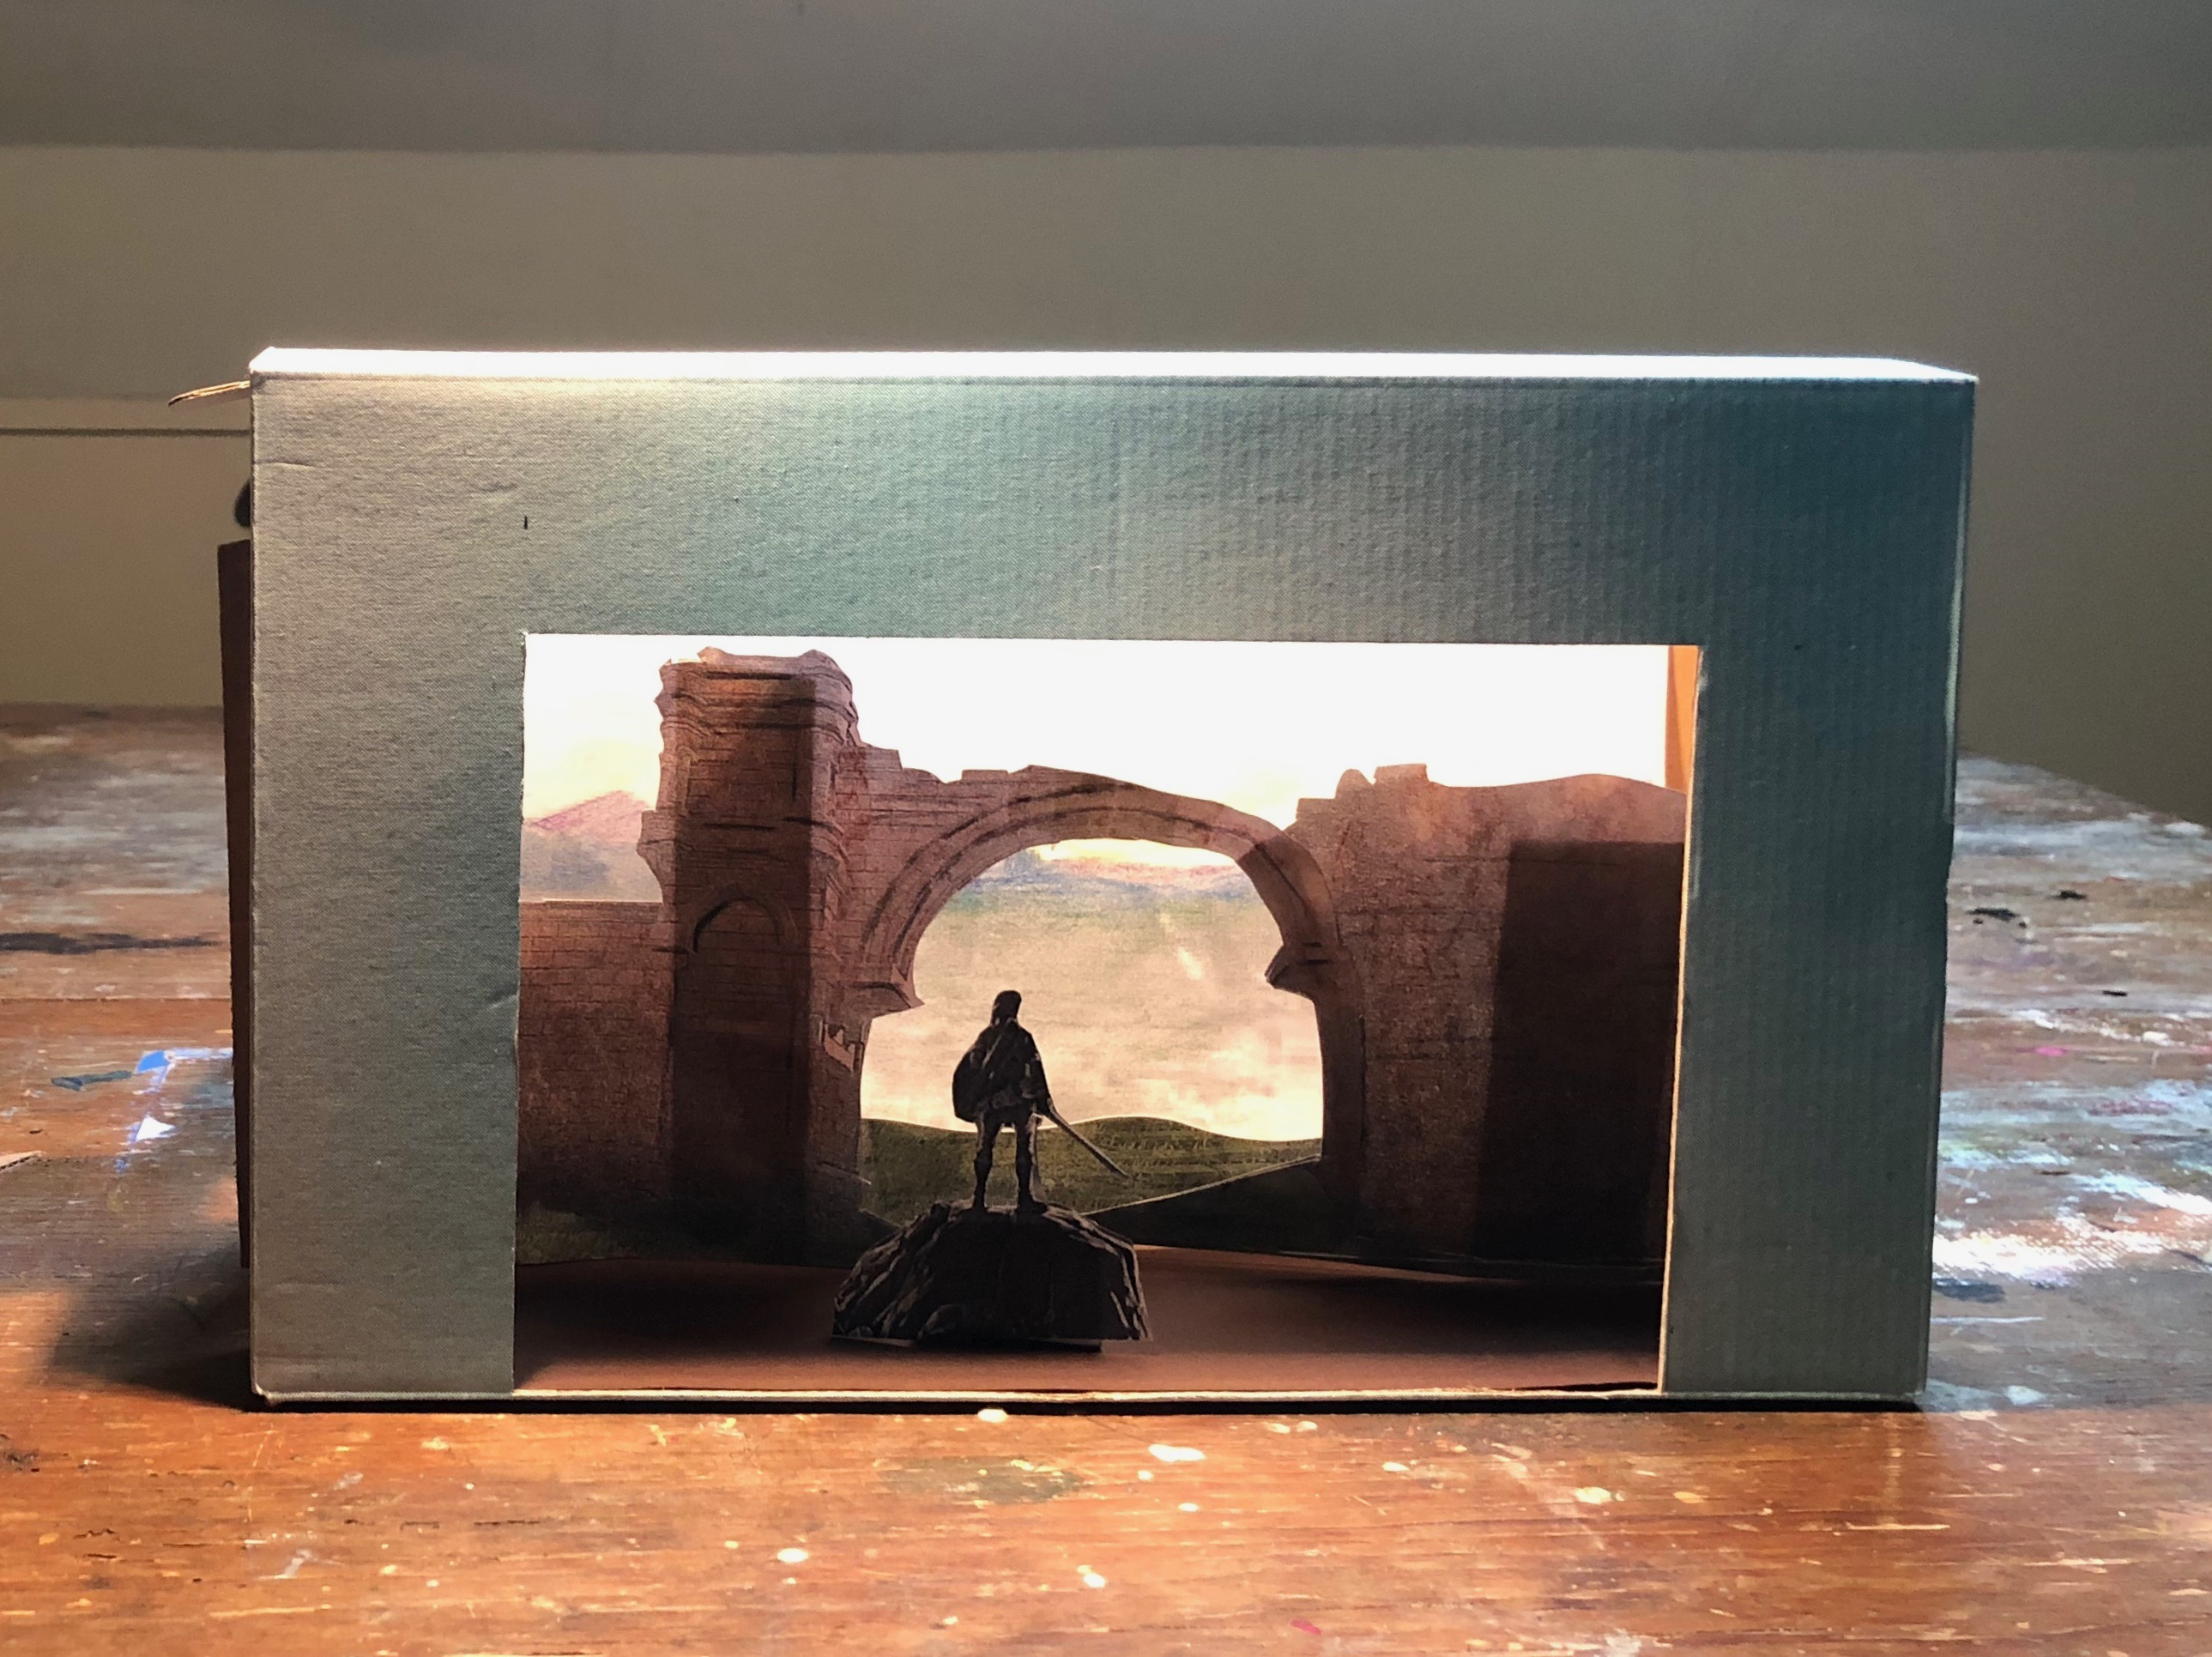
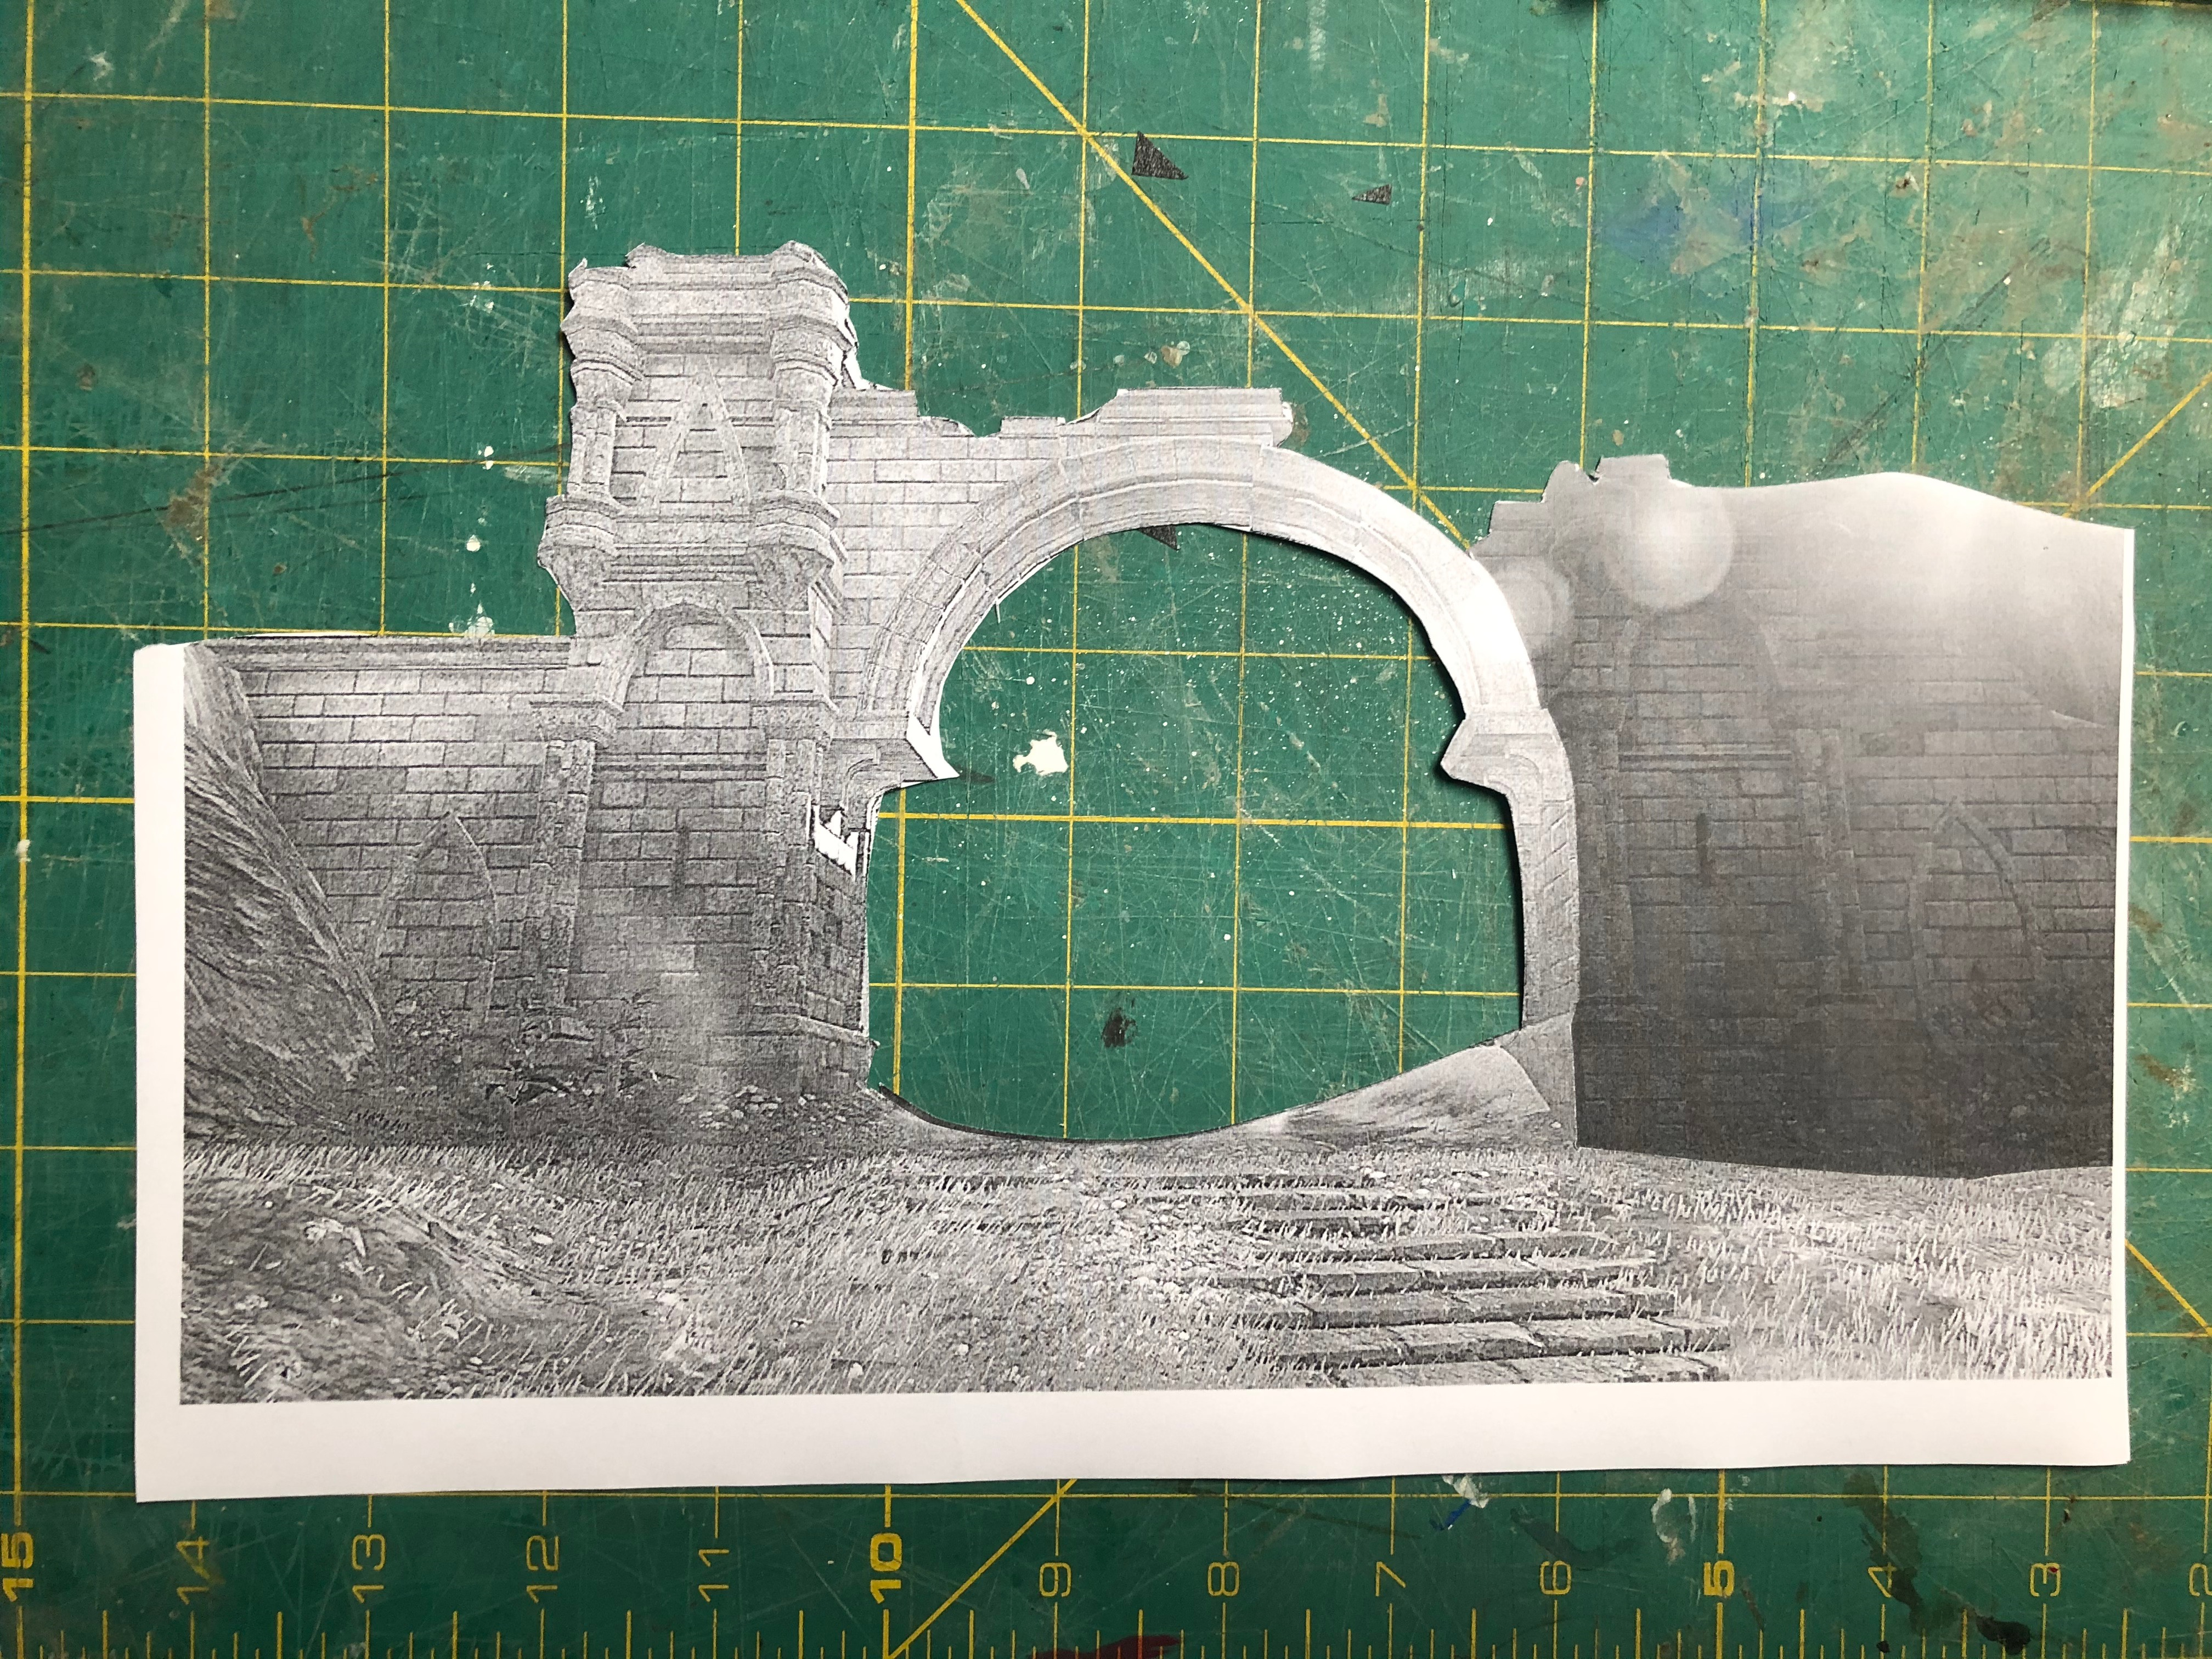
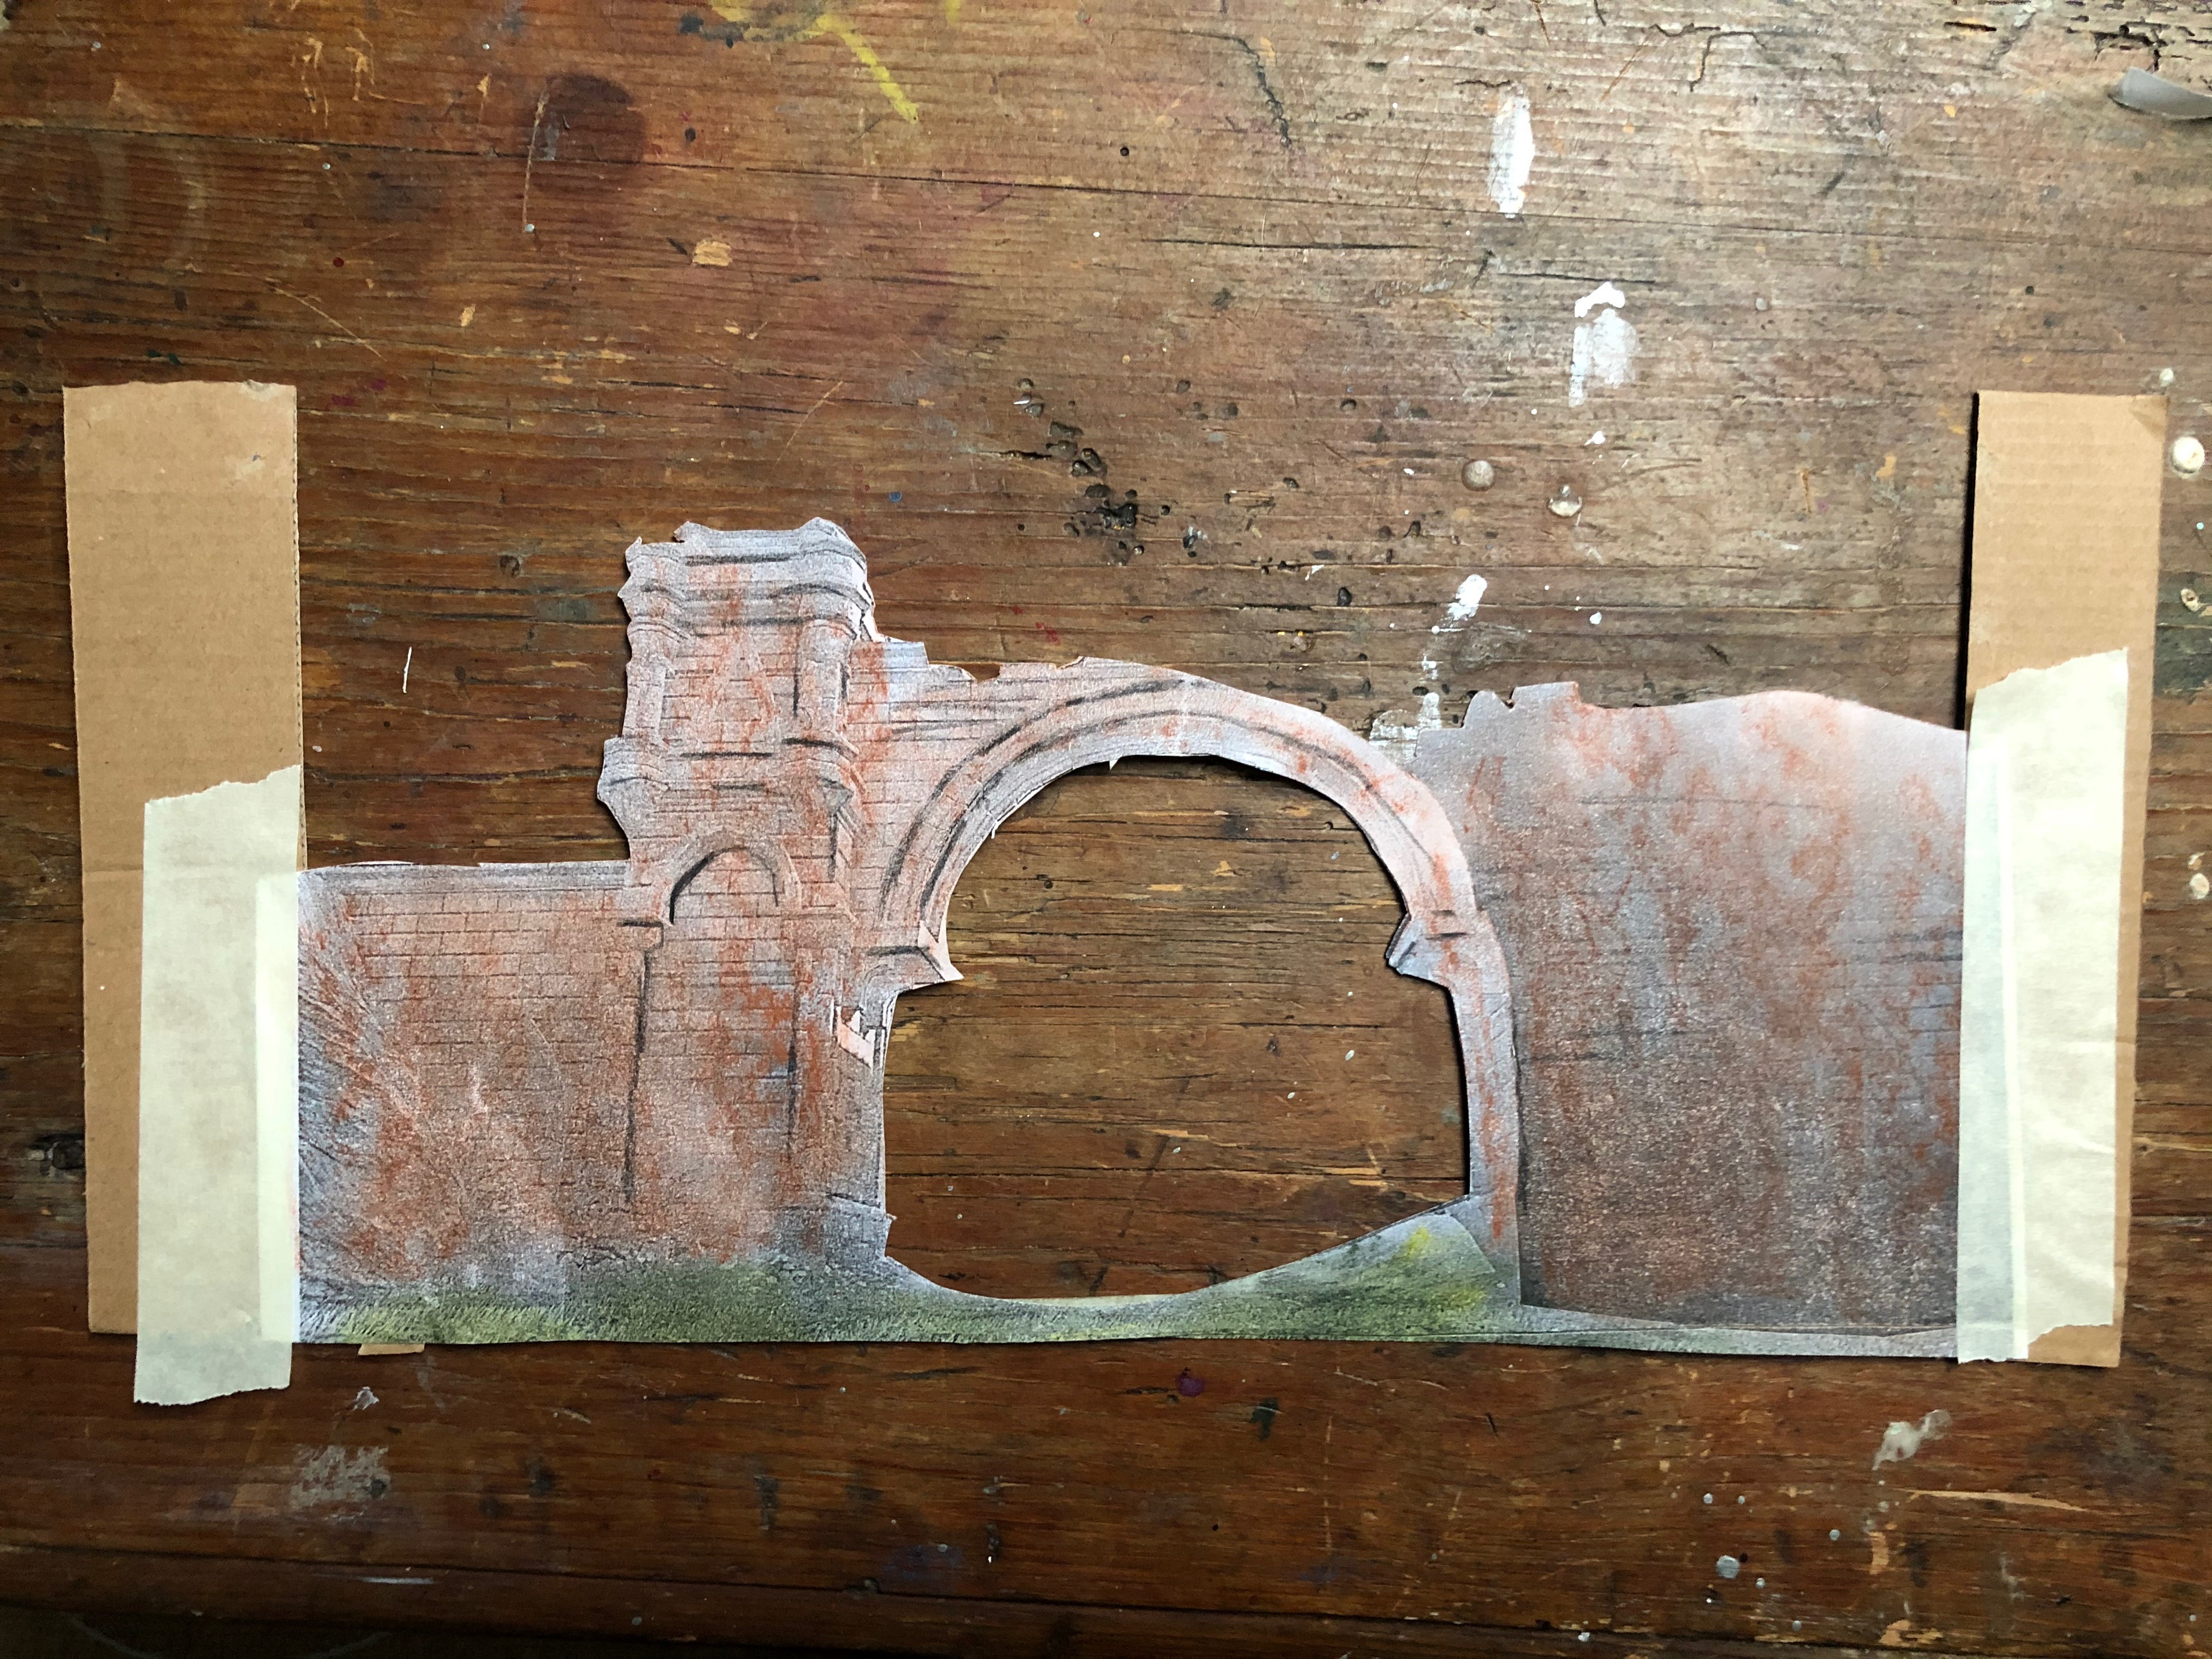
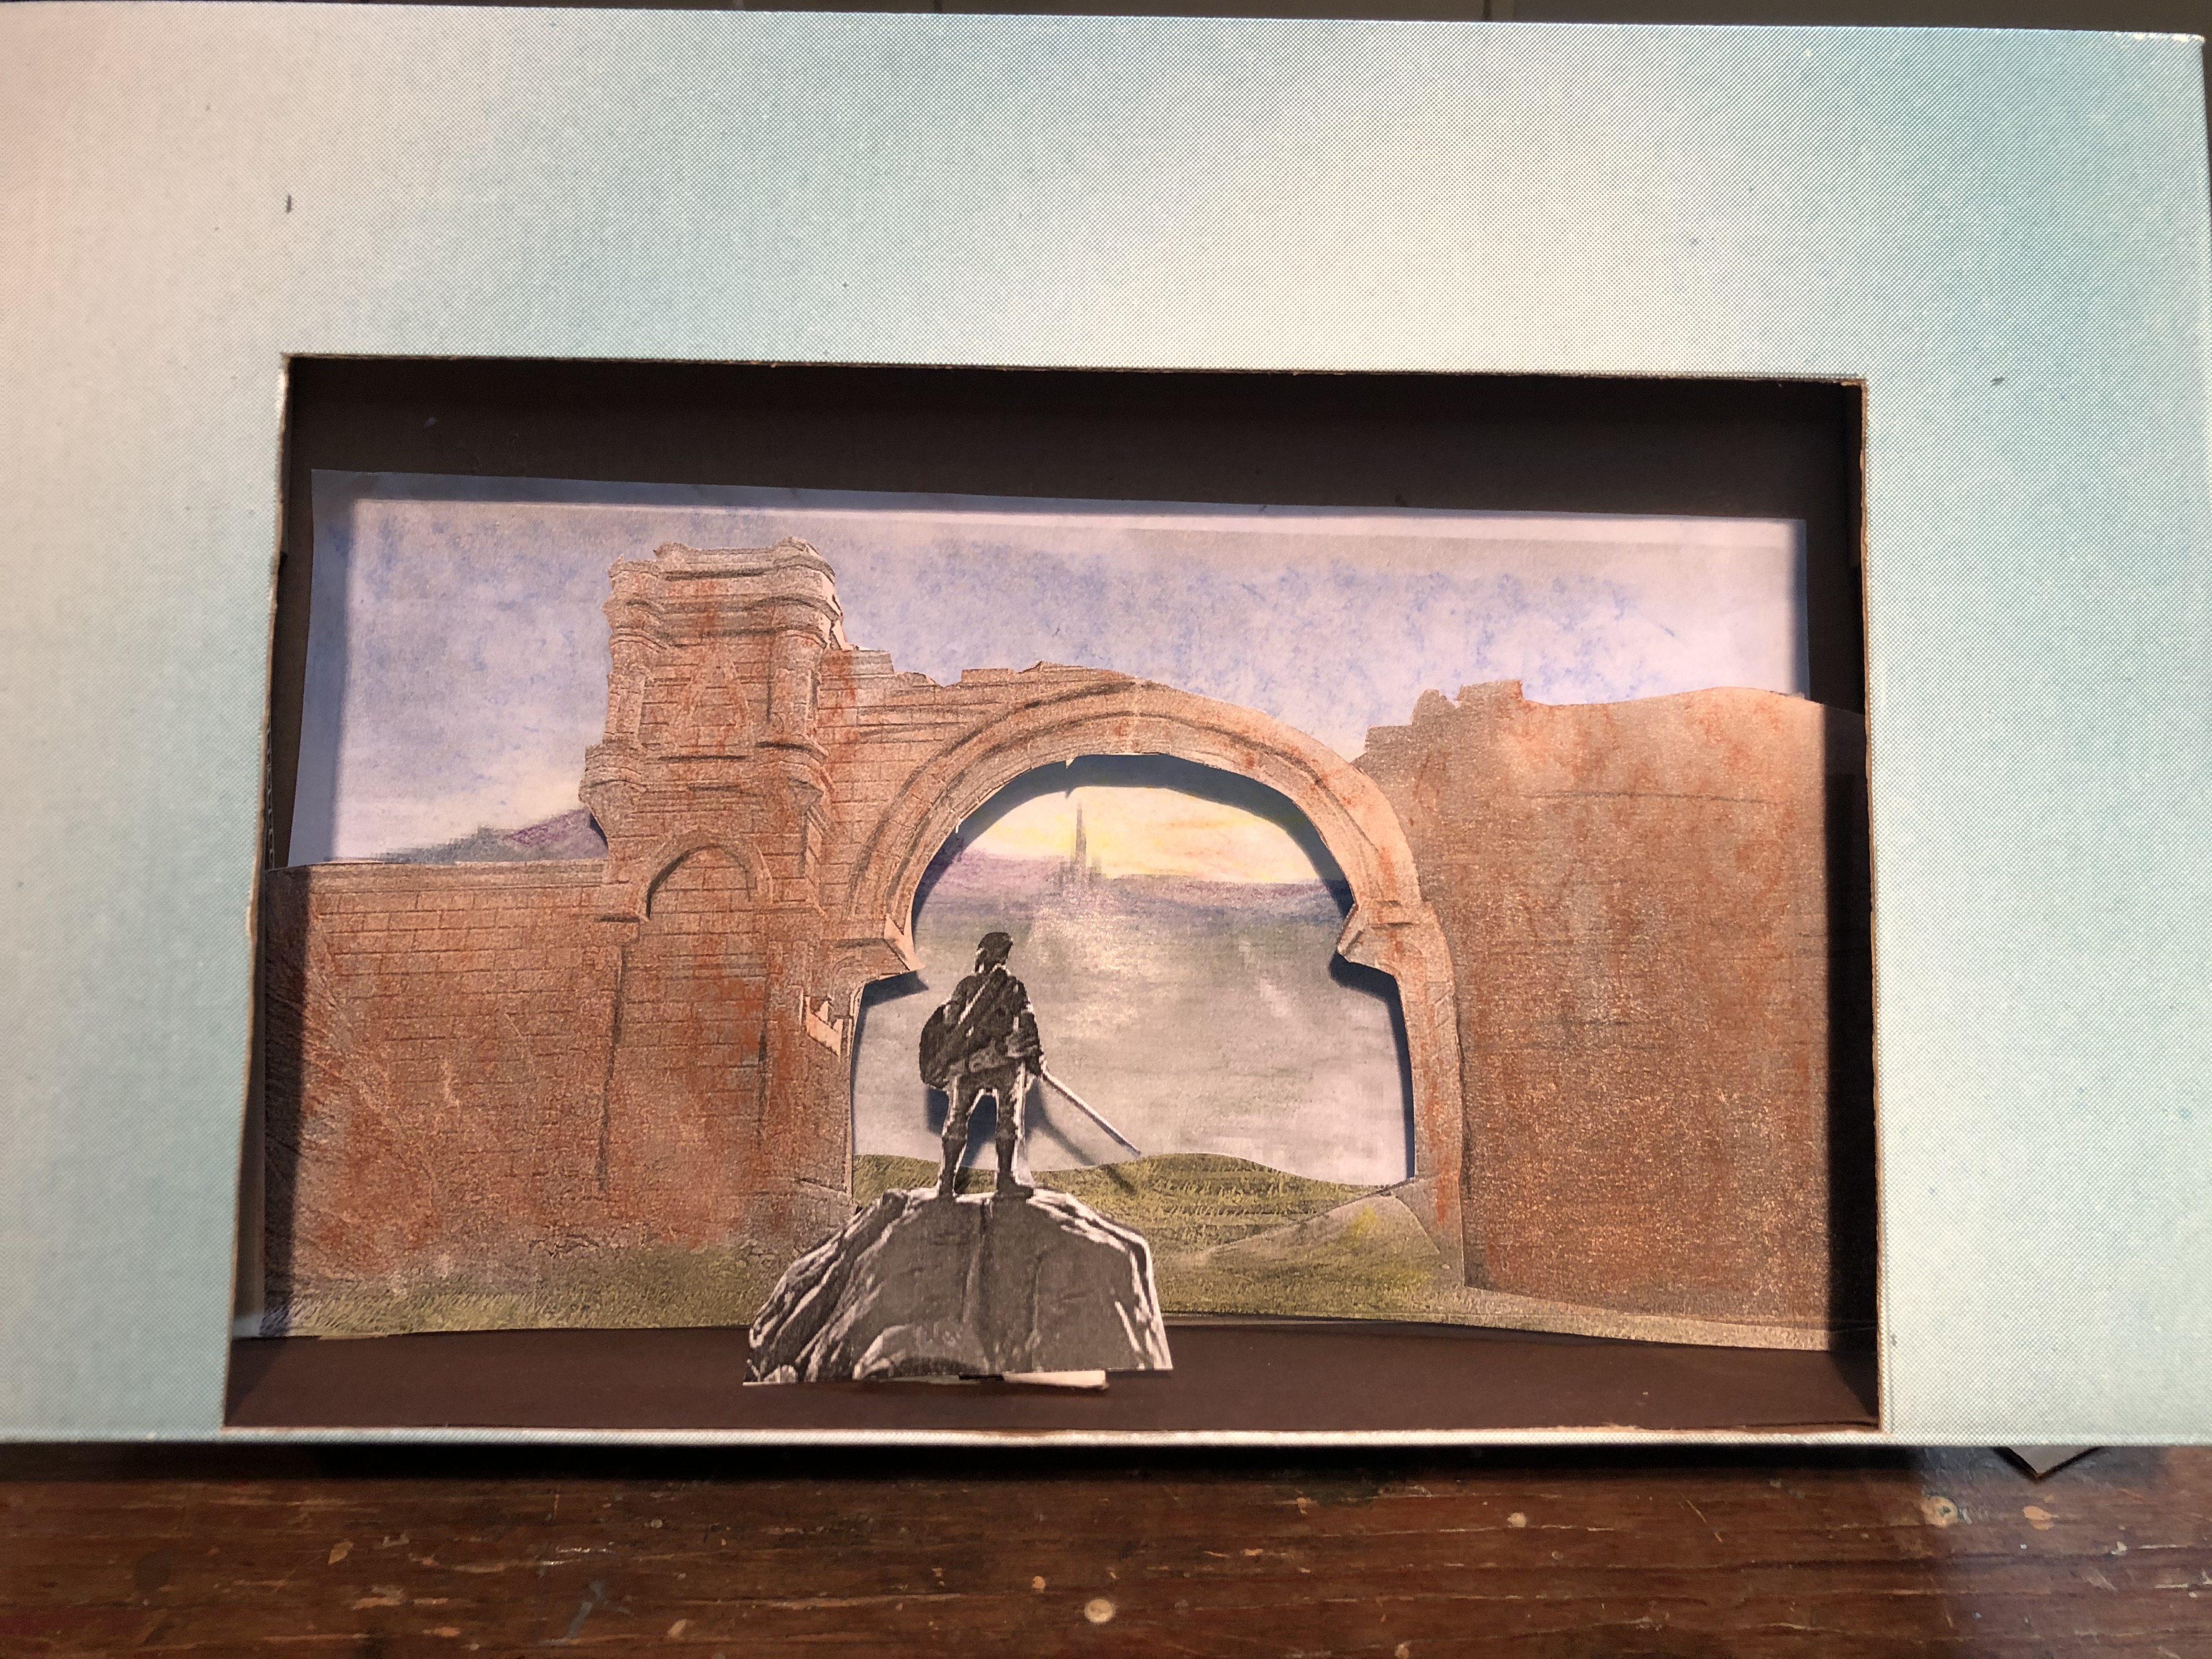
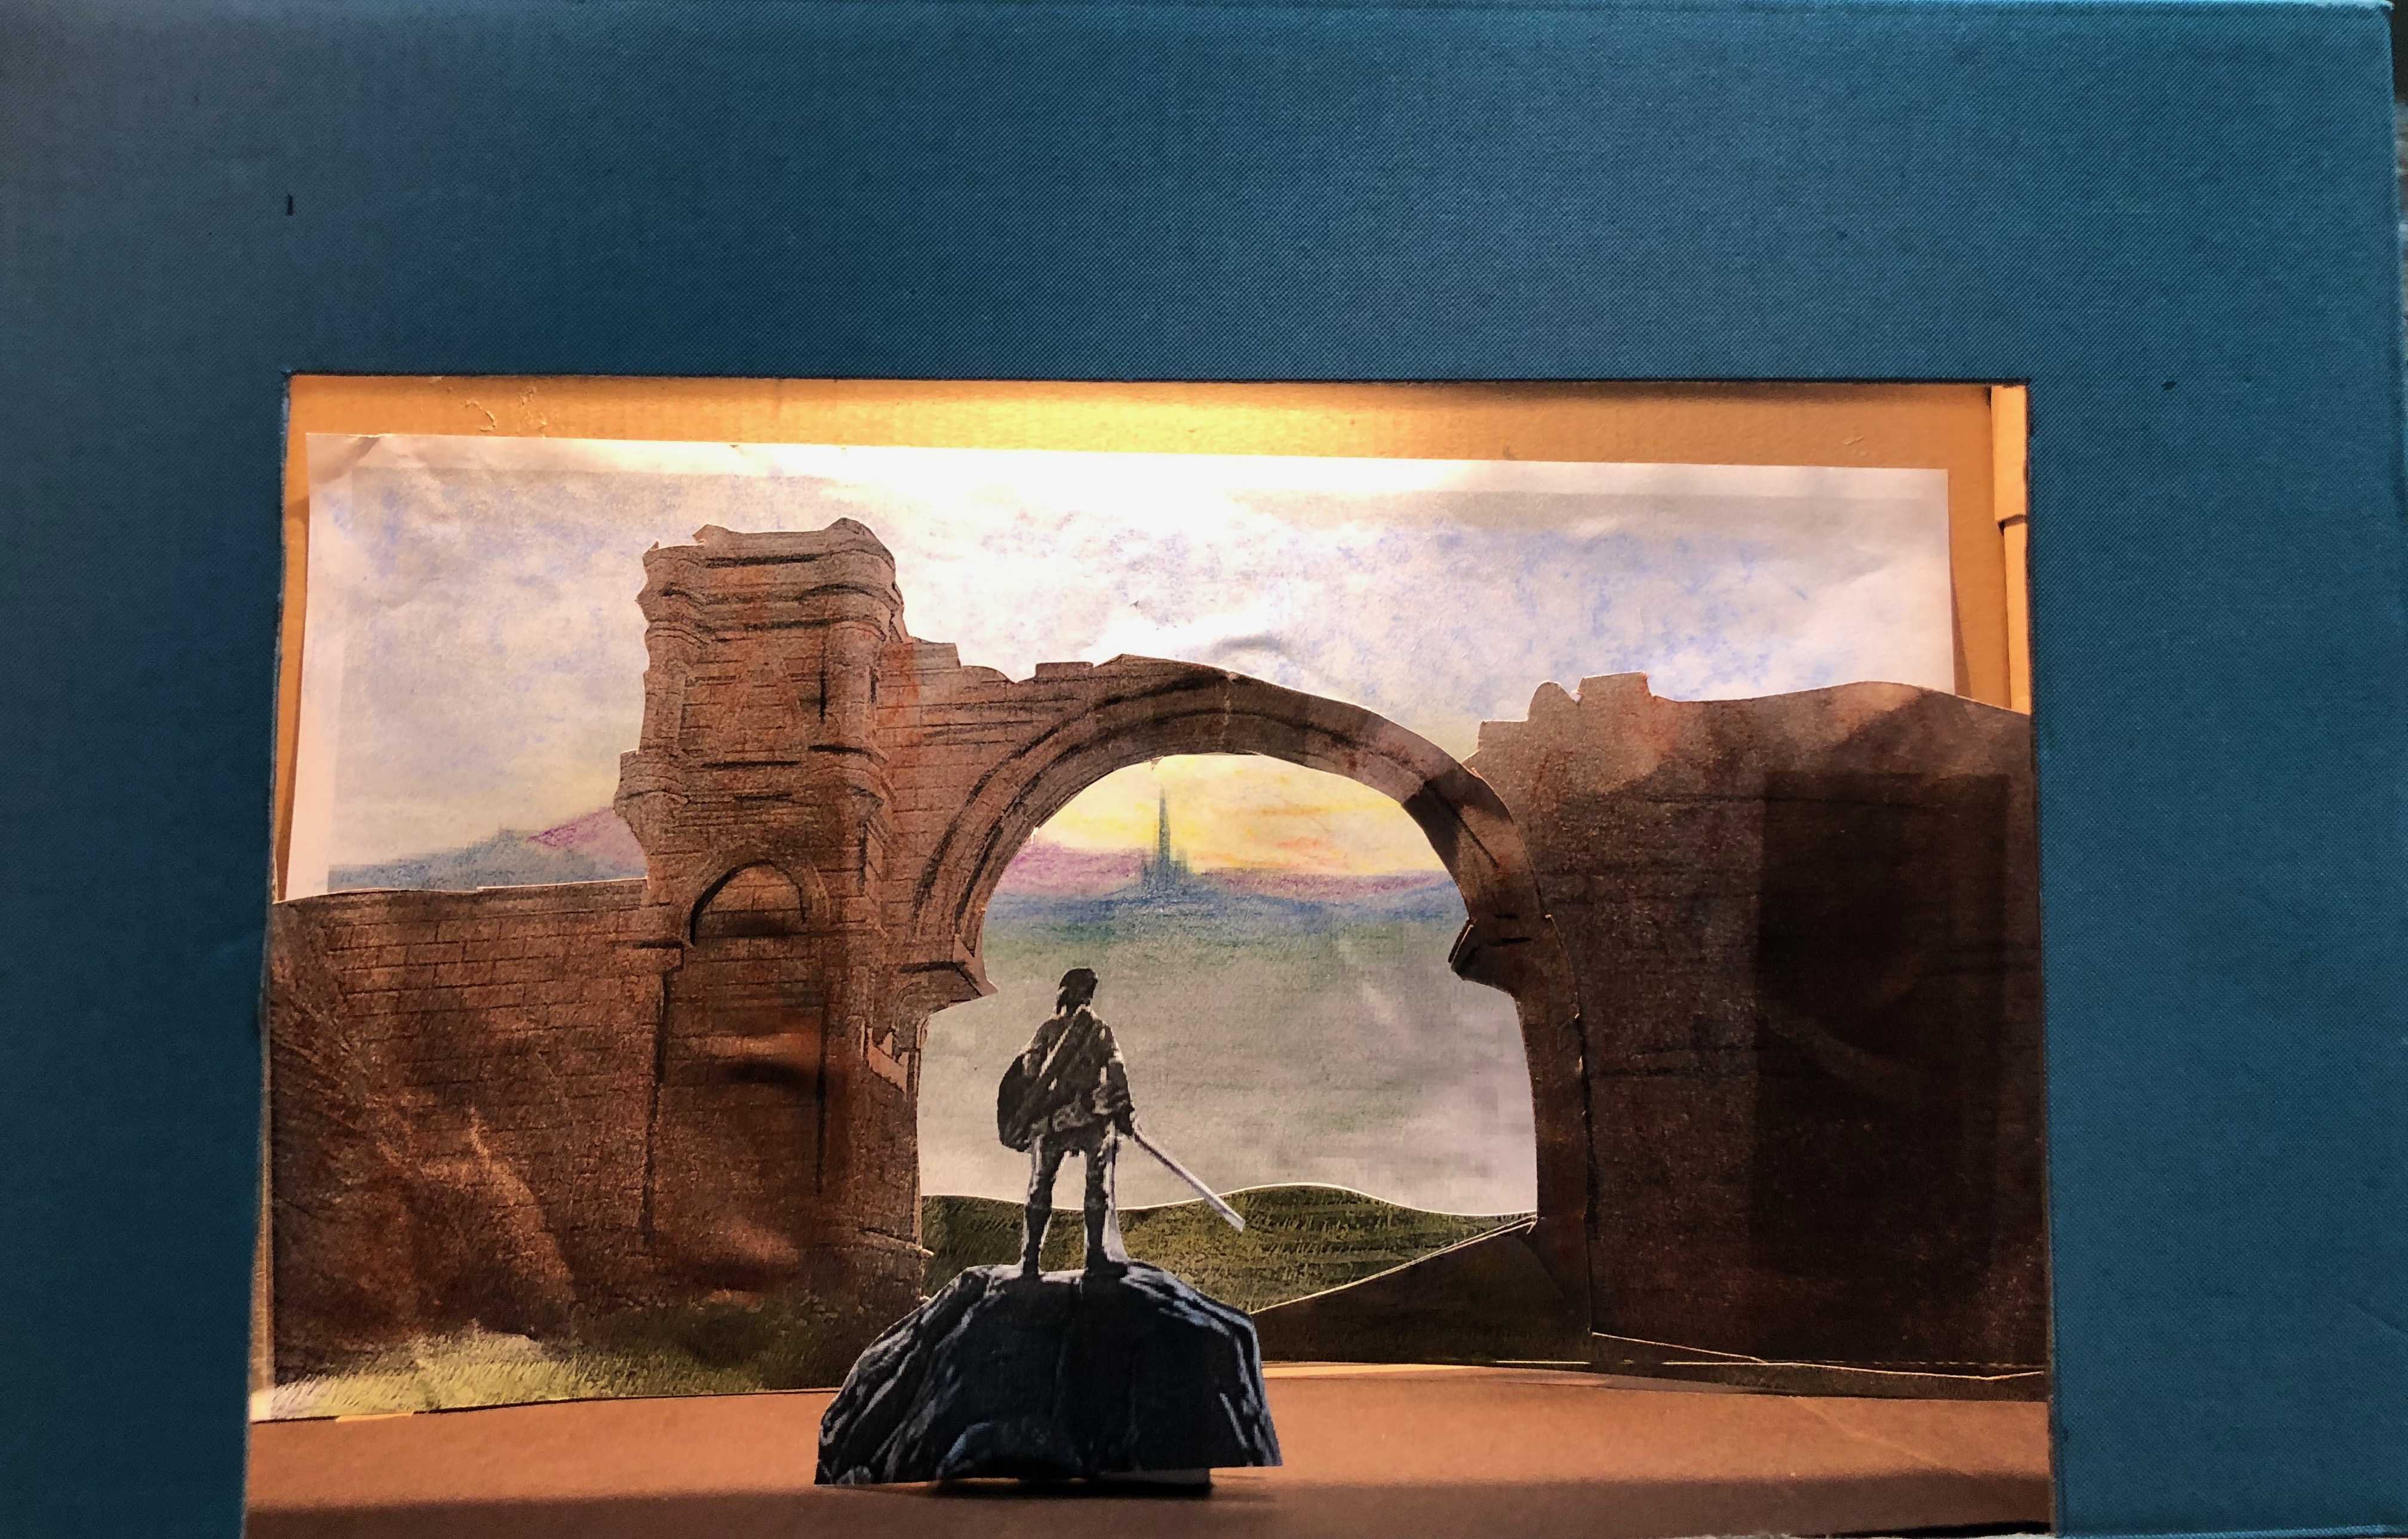
The mid-distance image which I have chosen is of a ruined arch. This will be my scenery.
Cut your image out and colour it in a similar way to before. To make it stand up in your theatre, you will need those two rectangles that you cut out earlier from the sides of your box. You can use this card to support your scenery and make it stand up by itself. You might find taping it to the theatre floor helps.
Finally, cut out the foreground image. I reinforced my figure with a bit of card and made it stand up with a bit of tape.
Now you can put the whole thing together. You have a backdrop of a landscape or skyline. In front of that you have some scenery which gives more detail about where the story takes place. Down stage you can put your figure.
Now you can experiment with lighting to achieve different effects.
Check out finished my example below!
What Next?
Now that you have made your first design, why don’t you try something else? Here are a few ideas:
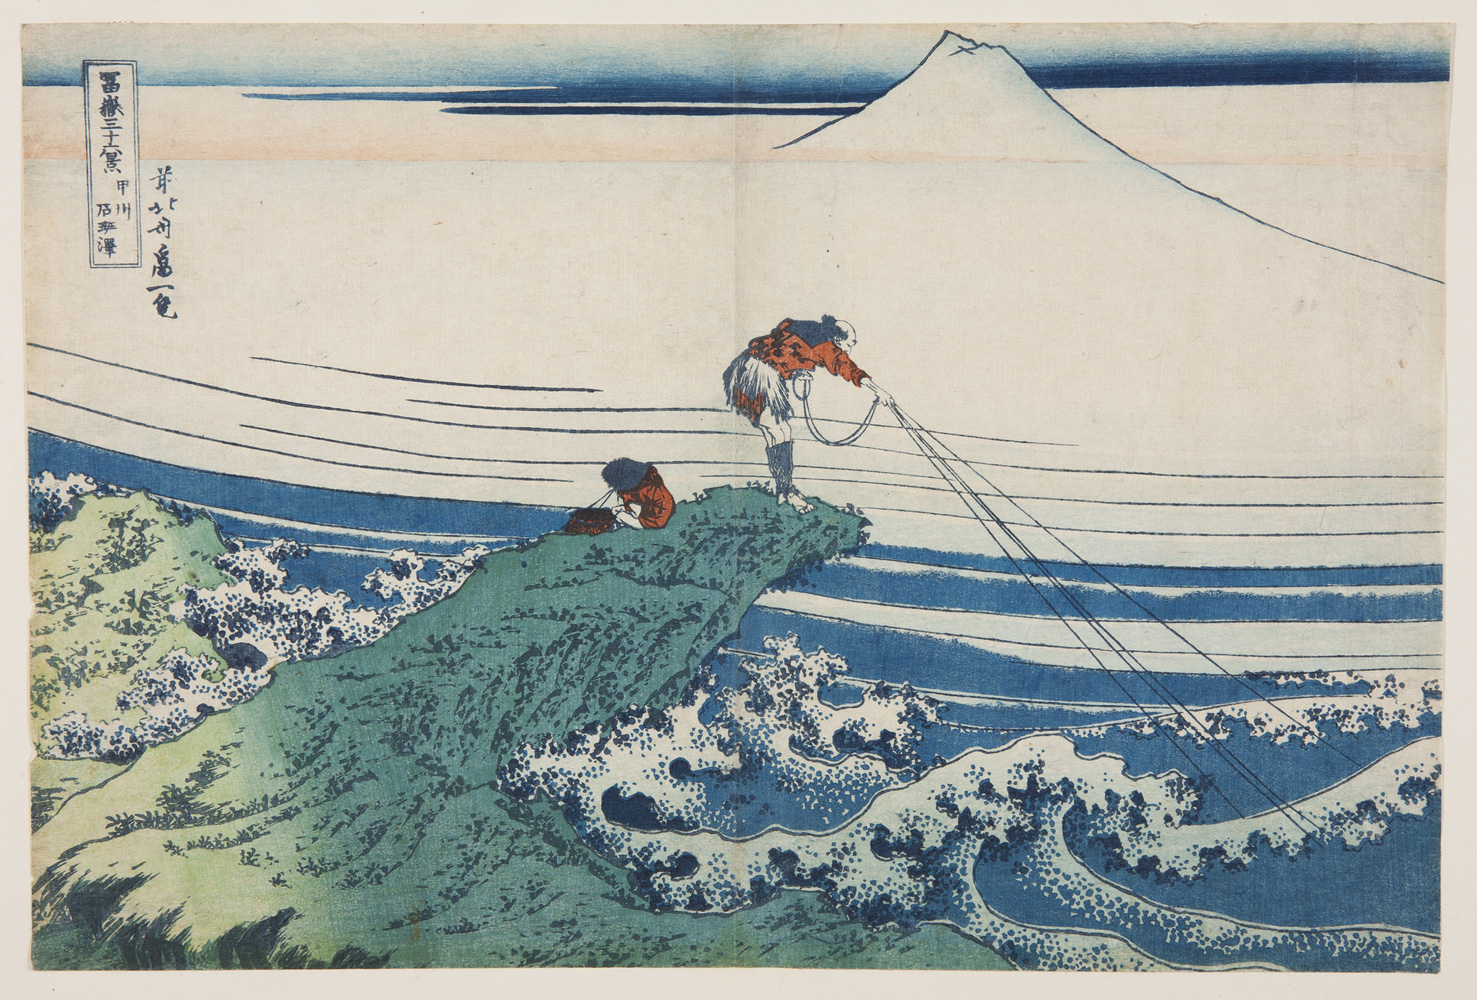
- Try making a photocopy of a painting into a 3D set. Some of the woodcuts by Hokosai work well. This one has a background (the mountains), a middle (the waves) and a fore ground figure.
- Have a go at drawing/painting your own designs for either a book or a song that you like. Set designers design pop videos too!
- Maybe you can take photos of where you live and make them into a set. You will need a sky line, a middle (maybe your home?) and a foreground image.
Make sure you take time to reflect on and record the skills you've used and learnt in today's activity!
If you enjoyed this challenge be sure to check out more opportunities from the Royal Opera House, including their Design Challenge which is a great enrichment project to build a strong portfolio.